中安拓也のブログ

プログラミングについて書くブログ

自作Cordovaプラグインの戻り値をPromiseにする

はじめに

今回は、以前自作したCordovaプラグイン、cordova-plugin-cache-deleteについて、引数に成功・失敗時のコールバック関数を受け取る形式から、コールバック関数を使わないPromiseベースのプラグインに変更する改修を実施していきます。

関連記事

自作Cordovaプラグイン、cordova-plugin-cache-deleteについて書いた過去記事です。

Webviewのキャッシュを削除するCordovaプラグインを作成しました - 中安拓也のブログ

初めてのCordovaプラグイン公開 - 中安拓也のブログ

cordova.execについて

そもそも、cordova-plugin-cache-deleteで、引数に成功時・失敗時のコールバック関数を受け取る形式を採用していたのは、ネイティブプラットフォーム(今回のプラグインではAndroid)と通信するためのcordova.execメソッドが成功時・失敗時のコールバック引数を受け取る仕様になっているためです。

下記がcordova.execメソッドになります。第一引数が成功時に呼び出されるコールバック関数、第二引数が失敗時のコールバック関数になっています。以下サイトから引用してます。

Plugin Development Guide - Apache Cordova

cordova.exec(function(winParam) {},
             function(error) {},
             "service",
             "action",
             ["firstArgument", "secondArgument", 42, false]);

上記のcordova.execの呼び出し方を変えることで、コールバックを廃止した、Promiseベースのプラグインに変更することができます。そうすることで、コールバックの多重ネスト問題(コールバック地獄)が発生しなくなるなどのメリットがあります。

プラグインの改修

cordova-plugin-cache-deleteのディレクトリ構造です。

.
├── LICENSE.txt
├── README.md
├── package.json
├── plugin.xml
├── src
│   └── android
│       ├── CacheDelete.java
│       └── android.iml
└── www
    └── CacheDelete.js

CordovaプラグインのIFを、コールバック関数を使用する形式から、Promiseを返す形式に変更したいので、プラグインのIF(ネイティブプラットフォームの呼び出し方)を定義している下記のJavaScriptファイルを改修していきます。

改修前: www/CacheDelete.js

var exec = require("cordova/exec");

module.exports = {
  deleteCache: function (success, error) {
    exec(success, error, "CacheDelete", "deleteCache", []);
  },
};

上記は、改修前のJavaScriptファイルになります。success引数とerror引数でコールバック関数を受け取り、cordova.execメソッドに渡しています。

上記のJavaScriptファイル経由でプラグインを呼び出す場合、次のような形式で呼び出す必要があります。成功時・失敗時のハンドリングを引数のコールバック関数で行っており、戻り値はありません。

CacheDelete.deleteCache(successCallback, errorCallback)

なお、上記のJavaScriptファイルで呼び出されるネイティブプラットフォーム側のコードは以下のようになっています。

src/android/CacheDelete.java

package jp.l08084.plugin;

import android.util.Log;

import org.apache.cordova.CallbackContext;
import org.apache.cordova.CordovaPlugin;
import org.json.JSONArray;
import org.json.JSONException;

import java.io.File;

public class CacheDelete extends CordovaPlugin {
    private static final String TAG = "CacheDelete";
    private static final String DELETE_CACHE_MESSAGE = "Cordova CacheDelete.deleteCache() called.";
    private static final String ERROR_MESSAGE = "Failed to delete the cache, error";

    @Override
    public boolean execute(String action, JSONArray args, final CallbackContext callbackContext)
            throws JSONException {
        Log.v(TAG, DELETE_CACHE_MESSAGE);
        if("deleteCache".equals(action)) {
            deleteCache(callbackContext);
            return true;
        }
        return false;
    }

    private void deleteCache(final CallbackContext callbackContext) {
        File cacheDir = cordova.getActivity().getApplicationContext().getCacheDir();
        clearCacheFolder(cacheDir, callbackContext);
    }

    private void clearCacheFolder (File dir, final CallbackContext callbackContext) {
        try {
            if (dir != null && dir.isDirectory()) {
                for (File child : dir.listFiles()) {
                    if (child.isDirectory()) {
                        clearCacheFolder(child, callbackContext);
                    }
                    child.delete();
                }
            }
            callbackContext.success();
        } catch (Exception ex) {
            Log.e(TAG, ERROR_MESSAGE, ex);
            callbackContext.error(ERROR_MESSAGE);
        }
    }

}

処理の成功時にcallbackContext.success();、失敗時にcallbackContext.error(ERROR_MESSAGE);を呼び出すことで、JavaScriptファイルから渡された成功時・失敗時のコールバック関数を呼び出しています。

それでは、JavaScriptファイルを改修してPromiseベースのプラグインに切り替えていきます。

改修後: www/CacheDelete.js

var exec = require("cordova/exec");

module.exports = {
  deleteCache: function () {
    return new Promise(function(resolve, reject) {
      exec(resolve, reject, "CacheDelete", "deleteCache", []);
    });
  },
};

成功(success)、失敗(error)時に渡していたコールバック関数の代わりにPromiseのresolverejectを渡すように改修しています。

動作確認

改修後のプラグインは以下のように呼び出すことができます。

import { Component } from '@angular/core';
import { Platform } from '@ionic/angular';

// アンビエント宣言
declare var CacheDelete: any;

@Component({
  selector: 'app-tab1',
  templateUrl: 'tab1.page.html',
  styleUrls: ['tab1.page.scss'],
})
export class Tab1Page {
  constructor(private platform: Platform) {}

  public ngOnInit(): void {
    this.platform.ready().then(() => {
      if (this.platform.is('android')) {
        // delete cache
        CacheDelete.deleteCache()
          .then(() => console.log('delete cache success!!'))
          .catch((error) => console.error(error));
      }
    });
  }
}

参考サイト

Cordova プラグインのコールバック地獄から脱却!Non-Angular アプリケーションでも Ionic Native を利用するという選択 - Qiita

GitHub - chemerisuk/cordova-plugin-firebase-analytics: Cordova plugin for Firebase Analytics

angular - Cordova (Ionic2) custom plugin: manage Angular2 new Promise() with cordova.exec() successHandler - Stack Overflow

Cordovaをdisる人類全員に読んでほしい「Cordovaつらいを考える」|榊原昌彦|note

初めてのCordovaプラグイン公開

はじめに

前回の記事cordova-plugin-cache-deleteというCordovaプラグインを作成したので、他の開発者にも使いやすいようにこのプラグインを公開していきます。

Cordovaプラグイン公開

Cordovaプラグインの公開ですが、公式サイトの説明を読むとnpmレジストリの使用を推奨しています。

通常のnpmライブラリ同様、npm publishコマンドでCordovaプラグインについても公開できちゃうんですね....

CordovaプラグインをインストールするCordova CLIのコマンド(cordova plugin add [plugin name])では、npmレジストリからプラグインを引っ張ってくる仕組みになっているようです。

npmアカウント作成

まず、こちらのリンクからnpmアカウントを作成します。

npm adduserコマンド

続いて、Cordovaプラグインのルートディレクトリに移動して、npm adduserコマンドを実行します。ちなみにnpm loginコマンドはnpm adduserコマンドのエイリアスのため、同じ機能を持つコマンドになります。

$ npm adduser

npmアカウント登録時に設定したUsernamePasswordEmailが聞かれるので回答します。

npm publishコマンド

準備ができたのでnpm publishコマンドを実行して、Cordovaプラグインを公開します。

$ npm publish ./

こんな感じのエラー(403 Forbidden)が出て、Cordovaプラグインの公開に失敗しました。

npm ERR! code E403
npm ERR! 403 403 Forbidden - PUT https://registry.npmjs.org/cordova-plugin-cache-delete - Forbidden
npm ERR! 403 In most cases, you or one of your dependencies are requesting
npm ERR! 403 a package version that is forbidden by your security policy.

npm ERR! A complete log of this run can be found in:
npm ERR!     /Users/takuya/.npm/_logs/2021-05-08T15_16_22_628Z-debug.log

スタックオーバーフローを見ると、メールアドレスの確認を実施していないせいで、npmアカウント登録が完全に完了していないのが原因じゃないかとのこと。

受信トレイを確認すると、確かにnpmから登録したメールアドレスの確認メールが来ていました...全然気づかなかった。

f:id:l08084:20210509174829p:plain
npm空のメールアドレスの確認メール

メールの本文にメールアドレスの確認が完了すると、publishができるようになるよ〜って書いてありますね。

メールのVerify email addressボタンを押下すると下記の画面に遷移します。

f:id:l08084:20210509175324p:plain
この画面の時点ではメールアドレスの確認は終わっていません

npmアカウントでログインし直すと、下記の画面が表示されます。

f:id:l08084:20210509175511p:plain
Continueボタンを押下すると、メールアドレスの確認が完了

上記画面でContinueボタンを押下すると、メールアドレスの確認が完了します。

メールアドレスの確認が完了した後に、npm publishコマンドを実行すると、今度はCordovaプラグインの公開に成功します。

$ npm publish ./
+ cordova-plugin-cache-delete@1.0.1

動作確認

npm publishした後だと、以下のようにcordova plugin add [プラグインの名前]でCordovaプラグインをインストールすることができるようになります。

$ cordova plugin add cordova-plugin-cache-delete

初回のCordovaプラグイン公開だけでなく、Cordovaプラグインのバージョンアップも下記の通りnpm publishで実行できます

# パッチバージョンを上げる
$ npm version patch
# バージョンのアップグレードをnpmレジストリに反映する
$ npm publish ./

参考サイト

Plugin Development Guide - Apache Cordova

Contributing packages to the registry | npm Docs

Plugins Release and Moving plugins to npm: April 21, 2015 - Apache Cordova

3分でできるnpmモジュール - Qiita

npm publish や unpublish とかいろいろやってみたメモ - Memento

vue.js - NPM: 403 forbidden - PUT http://registry.npmjs.org/[package-name] - Forbidden - Stack Overflow

「npm audit」って何?って時に少し調べた時のノート - Programming Self-Study Notebook

NPM's suggestion for package lock and audit is misleading or doesn't work - 2nd attempt - 💁🏾 support - npm community portal

Webviewのキャッシュを削除するCordovaプラグインを作成しました

はじめに

情報漏洩の対策として、Webviewに格納されるキャッシュを削除するCordovaプラグインを作成しました。Androidアプリのみに対応しています。

github.com

以前の記事において、cordova-plugin-ionic-webviewを改修することで、Webviewのキャッシュを削除する方法を紹介していますが、今回のプラグインでも同様の方法を採用してキャッシュを削除しています。

関連記事

以前書いたWebviewのキャッシュ削除についての記事になります。

【Cordova】【Android】 Webviewのキャッシュを消す - 中安拓也のブログ

環境

今回作成したCordovaプラグイン、cordova-plugin-cache-deleteは、下記バージョンのIonic(Angular, Cordova)で作成したAndroidアプリ上で動作確認しています。

ionic infoコマンドの実行結果

$ ionic info

Ionic:

   Ionic CLI                     : 6.11.8 (/usr/local/lib/node_modules/@ionic/cli)
   Ionic Framework               : @ionic/angular 5.6.6
   @angular-devkit/build-angular : 0.1102.11
   @angular-devkit/schematics    : 11.2.11
   @angular/cli                  : 11.2.11
   @ionic/angular-toolkit        : 3.1.1

Cordova:

   Cordova CLI       : 10.0.0
   Cordova Platforms : android 9.1.0
   Cordova Plugins   : cordova-plugin-ionic-keyboard 2.2.0, cordova-plugin-ionic-webview 4.2.1, (and 5 other plugins)

Utility:

   cordova-res : not installed
   native-run  : not installed

System:

   ios-deploy : 1.9.2
   ios-sim    : 6.1.2
   NodeJS     : v12.13.1 (/usr/local/bin/node)
   npm        : 6.14.12
   OS         : macOS Catalina
   Xcode      : Xcode 12.4 Build version 12D4e

Cordovaプラグイン作成

今回のCordovaプラグイン開発は以下のフォルダ構成で行います。

.
├── LICENSE.txt
├── README.md
├── package.json
├── plugin.xml
├── src
│   └── android
│       └── CacheDelete.java
└── www
    └── CacheDelete.js

LICENSE.txtREADME.mdは、Cordovaプラグインの機能と直接関係があるファイルではないため、説明を割愛します。

package.jsonの作成

今回作成したプラグイン、cordova-plugin-cache-deletepackage.jsonになります。

package.json

{
  "name": "cordova-plugin-cache-delete",
  "version": "1.0.0",
  "author": {
    "name": "Takuya Nakayasu",
    "email": "l08084.1989@gmail.com",
    "url": "https://github.com/l08084"
  },
  "homepage": "https://github.com/l08084/cordova-plugin-cache-delete",
  "cordova": {
    "id": "cordova-plugin-cache-delete",
    "platforms": [
      "android"
    ]
  },
  "repository": {
    "type": "git",
    "url": "git+https://github.com/l08084/cordova-plugin-cache-delete.git"
  },
  "description": "This is a WebView cache plugin for Cordova supporting Android. It allows to delete the cordova webview cache.",
  "license": "Apache-2.0",
  "keywords": [
    "cordova",
    "webview",
    "cache",
    "delete",
    "Code Cache",
    "android",
    "HTTP Cache",
    "cordova-android"
  ]
}

npm package.json 日本語版 取扱説明書 に従って項目を設定していきます。後述するplugin.xmlと記述内容の不一致が発生しないように注意する必要があります。

plugin.xmlの作成

続いて、plugin.xmlファイルを作成します。

<?xml version="1.0" encoding="UTF-8"?>
<plugin xmlns="http://apache.org/cordova/ns/plugins/1.0"
        xmlns:android="http://schemas.android.com/apk/res/android"
        id="cordova-plugin-cache-delete" version="1.0.0">

  <name>Cordova Cache Delete</name>
  <description>This is a WebView cache plugin for Cordova supporting Android. It allows to delete the cordova webview cache.</description>
  <license>Apache 2.0</license>
  <keywords>cordova, webview, cache, delete, Code Cache, android, HTTP Cache, cordova-android</keywords>
  <repo>https://github.com/l08084/cordova-plugin-cache-delete.git</repo>

  <js-module src="www/CacheDelete.js" name="CacheDelete">
    <clobbers target="CacheDelete" />
  </js-module>

  <platform name="android">
    <config-file target="res/xml/config.xml" parent="/*">
      <feature name="CacheDelete">
        <param name="android-package" value="jp.l08084.plugin.CacheDelete"/>
      </feature>
    </config-file>
    <source-file src="src/android/CacheDelete.java" target-dir="src/jp/l08084/plugin/" />
  </platform>

</plugin>

plugin.xmlファイルの設定内容について説明していきます。

xmlnsxmlns:androidxmlns:属性であり、XMLドキュメント内で名前空間の機能を提供して、要素名や属性名の競合を防ぐ機能があります。 別のCordovaプラグインを作成する場合でもxmlnsxmlns:androidはURIを含めてそのままコピーアンドペーストで問題ないと思います。

<js-module>はネイティブコードとのIFとして使用されるJavaScriptファイルの設定です。jsファイル内でmodule.exportsしたオブジェクトは、clobberstargetに設定したオブジェクトで参照できるようになります。

<platform name="android">はAndroidに関する設定です。android-packagevalueはパッケージ名、target-dirの値はビルド後にソースコードが配置されるディレクトリになるため、それぞれ対応した値を設定する必要があります。

plugin.xmlファイルに関して言うと、私は<param name="android-package" value="jp.l08084.plugin.CacheDelete"/>に設定されているパッケージ名と<source-file src="src/android/CacheDelete.java" target-dir="src/jp/l08084/plugin/" />に設定しているtarget-dirの値(ソースコードが配置されるディレクトリ)が一致していないせいでCordovaプラグインが起動しないバグに苦しみました。皆様もお気をつけ下さい......

JavaScriptファイルの作成

モバイルアプリからネイティブコード(Android)を呼び出す時のIFになってくれるJavaScriptファイルを作成します。

www/CacheDelete.js

var exec = require("cordova/exec");

module.exports = {
  deleteCache: function (success, error) {
    exec(success, error, "CacheDelete", "deleteCache", []);
  },
};

Webviewのキャッシュを削除するメソッド、deleteCacheを定義しています。

plugin.xmlファイルで<clobbers target="CacheDelete" />と設定しているため、アプリ側から、上記のdeleteCacheメソッドを呼び出す時は、下記のように呼び出す必要があります。

CacheDelete.deleteCache();

メソッド(deleteCache)内で呼び出している、exec(success, error, "CacheDelete", "deleteCache", [])メソッドは、ネイティブコード(Angular, iOS)などの処理を呼び出すメソッドになります。execメソッドの内容としては下記の通りになります。

  • 第一引数は処理の成功時に呼び出したいコールバック関数。アプリ側から渡したものをそのままネイティブコード側に渡しているため、上記のJSファイルには内容は記載されていません
  • 第二引数は処理の失敗時に呼び出したいコールバック関数。。アプリ側から渡したものをそのままネイティブコード側に渡しているため、上記のJSファイルには内容は記載されていません
  • 第三引数はネイティブコード側で呼び出すサービス名です。今回の例では、CacheDeleteクラスを呼び出したいため、"CacheDelete"を設定しています
  • 第四引数は、ネイティブコード側に渡されるアクション名です。ネイティブコード側では、渡されたアクションとマッピングするこで対応するメソッドを呼び出します。今回は"deleteCache"という文字列を渡しています
  • 第五引数は、ネイティブコード側に渡したい引数になります。今回は渡したい引数がないため、空の配列([])を渡しています

ネイティブコード(Android)の作成

下記のネイティブコード(Android)で、キャッシュファイルをFile.delete()メソッドで全て削除する処理を実装しています。

src/android/CacheDelete.java

package jp.l08084.plugin;

import java.io.File;

import org.apache.cordova.CallbackContext;
import org.apache.cordova.CordovaPlugin;
import org.apache.cordova.PluginResult;
import org.json.JSONArray;
import org.json.JSONException;

import android.util.Log;

public class CacheDelete extends CordovaPlugin {
    private static final String TAG = "CacheDelete";
    private static final String DELETE_CACHE_MESSAGE = "Cordova CacheDelete.deleteCache() called.";
    private static final String ERROR_MESSAGE = "Failed to delete the cache, error";
    
    @Override
    public boolean execute(String action, JSONArray args, final CallbackContext callbackContext)
            throws JSONException {
        Log.v(TAG, DELETE_CACHE_MESSAGE);
        if("deleteCache".equals(action)) {
            deleteCache(callbackContext);
            return true;
        }
        return false;
    }

    private void deleteCache(final CallbackContext callbackContext) {
        File cacheDir = cordova.getActivity().getApplicationContext().getCacheDir();
        clearCacheFolder(cacheDir, callbackContext);
    }

    private void clearCacheFolder (File dir, final CallbackContext callbackContext) {
        try {
            if (dir != null && dir.isDirectory()) {
                for (File child : dir.listFiles()) {
                    if (child.isDirectory()) {
                        clearCacheFolder(child, callbackContext);
                    }
                    child.delete();
                }
            }
            callbackContext.success();
        } catch (Exception ex) {
            Log.e(TAG, ERROR_MESSAGE, ex);
            callbackContext.error(ERROR_MESSAGE);
        }
    }
}

上記のネイティブコードだと、execute(String action, JSONArray args, final CallbackContext callbackContext)メソッドがキーポイントになります。executeメソッドはJSファイルのexecからコールされています。executeメソッドとexecメソッドは下記の通り対応しています。

  • executeメソッドのaction引数にはexecメソッドの第四引数で渡した文字列がセットされます。今回は"deleteCache"がセットされます
  • executeメソッドのargs引数にはexecメソッドの第四引数で渡した配列がJSONArrayとしてセットされます。今回は使用していません
  • executeメソッドのcallbackContext引数にはexecメソッドの第一、二引数の成功/失敗時のコールバック関数がCallbackContextとしてセットされます

キャッシュファイルの削除処理が正常完了したら、callbackContext.success();を呼び出して成功時のコールバック処理を実行し、キャッシュファイルの削除処理が失敗した場合はcallbackContext.error(ERROR_MESSAGE);で失敗時のコールバック関数を呼び出しています。

プラグインのテスト

上記で作成したcordova-plugin-cache-deleteをIonicプロジェクトに取り込んで、正常に動作するかテストしていきます。

まず、下記のコマンドでIonic(Cordova)のプロジェクトcordovaPluginWebviewCacheTestを作成します。

$ ionic start cordovaPluginWebviewCacheTest tabs --cordova

続いて、下記のコマンドでIonicプロジェクトにcordova-plugin-ionic-webviewをインストールします。

$ cordova plugin add https://github.com/l08084/cordova-plugin-cache-delete.git

下記のエラーCordovaError: Current working directory is not a Cordova-based project.が発生してインストールに失敗しました。

(node:18236) UnhandledPromiseRejectionWarning: CordovaError: Current working directory is not a Cordova-based project.
    at Object.cdProjectRoot (/usr/local/lib/node_modules/cordova/node_modules/cordova-lib/src/cordova/util.js:170:15)
    at /usr/local/lib/node_modules/cordova/node_modules/cordova-lib/src/cordova/plugin/index.js:36:40
    at _fulfilled (/usr/local/lib/node_modules/cordova/node_modules/cordova-lib/node_modules/q/q.js:787:54)
    at /usr/local/lib/node_modules/cordova/node_modules/cordova-lib/node_modules/q/q.js:816:30
    at Promise.promise.promiseDispatch (/usr/local/lib/node_modules/cordova/node_modules/cordova-lib/node_modules/q/q.js:749:13)
    at /usr/local/lib/node_modules/cordova/node_modules/cordova-lib/node_modules/q/q.js:810:14
    at flush (/usr/local/lib/node_modules/cordova/node_modules/cordova-lib/node_modules/q/q.js:108:17)
    at processTicksAndRejections (internal/process/task_queues.js:75:11)
(node:18236) UnhandledPromiseRejectionWarning: Unhandled promise rejection. This error originated either by throwing inside of an async function without a catch block, or by rejecting a promise which was not handled with .catch(). (rejection id: 1)
(node:18236) [DEP0018] DeprecationWarning: Unhandled promise rejections are deprecated. In the future, promise rejections that are not handled will terminate the Node.js process with a non-zero exit code.

上記のエラーを修正するため、下記の記事を参考にルートに空のwwwフォルダを作成します。

【Cordova】「Current working directory is not a Cordova based project」エラーの対処法 – 株式会社シーポイントラボ | 浜松のシステム・RTK-GNSS開発

f:id:l08084:20210504193002p:plain
空のwwwディレクトリを作成する

再度cordova plugin addコマンドを実行すると、今度はインストールに成功します。

続いて、Ionicプロジェクトからcordova-plugin-ionic-webviewを呼び出すソースコードを書きます。

src/app/tab1/tab1.page.ts

import { Component } from '@angular/core';
import { Platform } from '@ionic/angular';

declare var CacheDelete: any;

@Component({
  selector: 'app-tab1',
  templateUrl: 'tab1.page.html',
  styleUrls: ['tab1.page.scss'],
})
export class Tab1Page {
  constructor(private platform: Platform) {}

  public ngOnInit(): void {
    this.platform.ready().then(() => {
      if (this.platform.is('android')) {
        CacheDelete.deleteCache(this.successCallback, this.errorCallback);
      }
    });
  }

  private successCallback(): void {
    console.log('success');
  }

  private errorCallback(): void {
    console.log('error');
  }
}

TypeScript(Ionicのプロジェクト)からJSのライブラリ(Cordovaプラグイン)を呼び出すという形になるため、declare var CacheDelete: any;アンビエント宣言をすることで、CacheDeleteオブジェクトを利用可能な状態にしています。

Webviewのキャッシュを削除する処理を呼び出している箇所はCacheDelete.deleteCache(this.successCallback, this.errorCallback);になります。

続いて、下記のコマンドでIonicプロジェクトからAndroidアプリを作成して、動作確認をしていきます。

$ ionic cordova build android

上記のビルドコマンドで作成されたAndroidプロジェクトを見ていきます。

plugin.xmlの設定通り、src/main/res/xml/config.xmlCacheDeleteの設定が反映されていることがわかります。

f:id:l08084:20210507215551p:plain
config.xmlにplugin.xmlの設定が反映されている

plugin.xmlの<source-file src="src/android/CacheDelete.java" target-dir="src/jp/l08084/plugin/" />で設定した通りの箇所にソースファイルが配置されていることも確認できます。

f:id:l08084:20210507232713p:plain
plugin.xmlの設定通りにJava(Android)が配置されている

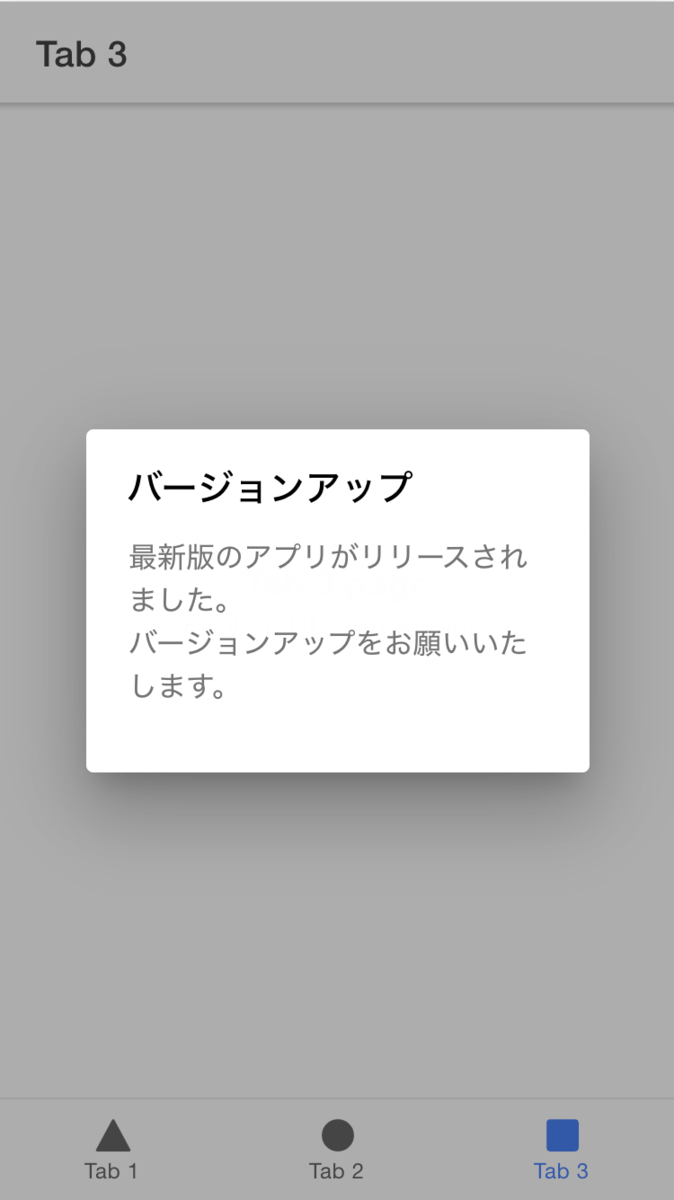
エミュレーターでIonicのAndroidプロジェクトを立ち上げます。

f:id:l08084:20210508003502p:plain
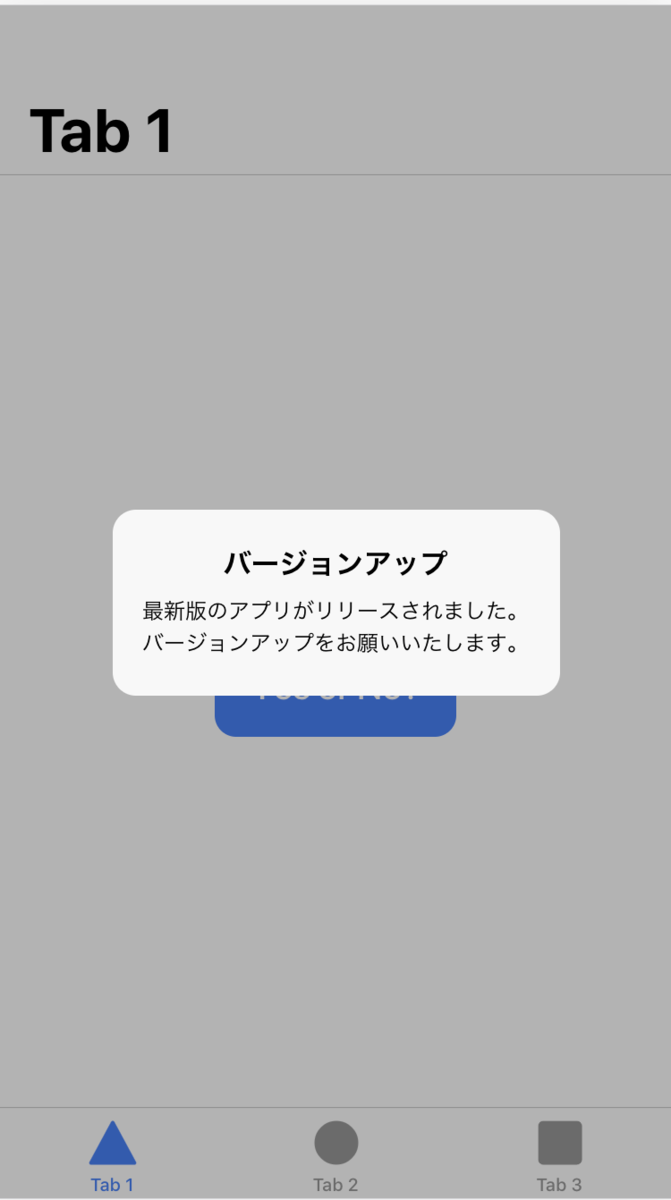
エミュレーター上でAndroidのサンプルアプリを立ち上げる

上記AndroidのサンプルアプリからCacheDelete.deleteCache()を呼び出すと、下記の通り、Webviewのキャッシュファイルが全て削除されることが確認できました。

f:id:l08084:20210508003305p:plain
キャッシュファイルが全て削除される

参考サイト

Ionic Native Pluginを自作する - Qiita

Native APIs - Ionic Framework 日本語ドキュメンテーション

GitHub - tiltshiftfocus/cordova-plugin-cache: This is a phonegap / cordova 3.3.0 plugin (iOS / Android) which allows to clear the cordova webview cache.

GitHub - Sharinglabs/cordova-plugin-cache: This is a phonegap / cordova 3.3.0 plugin (iOS / Android) which allows to clear the cordova webview cache.

GitHub - moderna/cordova-plugin-cache: This is a phonegap / cordova 3.3.0 plugin (iOS / Android) which allows to clear the cordova webview cache.

GitHub - rehiy/cordova-plugin-cache-clear: WebView cache plugin for Cordova

GitHub - ionic-team/ionic-native: Native features for mobile apps built with Cordova/PhoneGap and open web technologies. Complete with TypeScript support. The successor to ngCordova. Pairs exquisitely with a nice bottle of Ionic Framework.

npm package.json 日本語版 取扱説明書

npm

GitHub - timbru31/cordova-plugin-delete-launch-screen-cache: 🧹🌅 Apache Cordova plugin to programmatically delete the iOS launch screen cache on iOS 13+

【ionic】Ionic native pluginの作成|ブログ|West Wind Corporation

Capacitor - Webアプリをクロスプラットフォームに展開

GitHub - mesmotronic/cordova-plugin-fullscreen: Plugin for Cordova (PhoneGap) to enable Android's various full screen modes

Cordova plugin.xmlの内容について - Qiita

エンジニアが最低限理解しておくべきOSSライセンスの基礎知識 | フューチャー技術ブログ

OpenSharingGuideline/ApacheLicense2.0ライセンス付与のしかた:採用の理由.md at master · YCAMInterlab/OpenSharingGuideline · GitHub

ApacheライセンスのソースコードをGitHubにあげるまで - Qiita

Cordova Pluginの基本事項 - Qiita

Android Plugins - Apache Cordova

【Cordova】「Current working directory is not a Cordova based project」エラーの対処法 – 株式会社シーポイントラボ | 浜松のシステム・RTK-GNSS開発

TypeScript|アンビエント宣言(declare)と型定義ファイル(.d.ts) - わくわくBank

アンビエント宣言(declare) - TypeScript Deep Dive 日本語版

GitHub - DefinitelyTyped/DefinitelyTyped: The repository for high quality TypeScript type definitions.

ionic3のNative pluginを作る #ionic #cordova | 最初の4つの音の先へ

IPA ISEC セキュア・プログラミング講座:Webアプリケーション編 第5章 暴露対策:プロキシキャッシュ対策

重要情報の漏えいにつながるスマホアプリのキャッシュ問題と対策 | セキュリティ対策のラック

XML ドキュメントでの名前空間の管理 | Microsoft Docs

Cordova PluginのJavaScript部分の実装 - Qiita

【Ionic v5】スライドの枚数が多いSlidesのパフォーマンスを改善する

f:id:l08084:20210418140904g:plain
スライド画面

はじめに

Ionicでモバイルアプリケーションを作成している時に、30枚以上のスライドを搭載しているSlidesを使用した画面において、スライドで表示しているボタンやラベルが時々消えてしまう障害を検知したことがあります。

今回は、上記のようなスライドの枚数が多いことで発生するパフォーマンス起因の障害を解消するための方法について説明します。

環境

TypeScriptベースのフレームワークであるAngularと、iOS/AndroidのハイブリッドモバイルアプリケーションのフレームワークであるIonicを使用しています。

ionic infoコマンドの実行結果

$ ionic info

Ionic:

   Ionic CLI                     : 6.11.8 (/usr/local/lib/node_modules/@ionic/cli)
   Ionic Framework               : @ionic/angular 5.6.4
   @angular-devkit/build-angular : 0.1102.9
   @angular-devkit/schematics    : 11.2.9
   @angular/cli                  : 11.2.9
   @ionic/angular-toolkit        : 3.1.1

Utility:

   cordova-res : not installed
   native-run  : not installed

System:

   NodeJS : v12.13.1 (/usr/local/bin/node)
   npm    : 6.14.12
   OS     : macOS Catalina

今回使用するサンプルアプリについて

10枚のスライドを表示する下記のサンプルアプリを使用して、パフォーマンスの改善案について説明します。

f:id:l08084:20210418140904g:plain
今回使用するサンプルアプリ

10枚のスライドを表示する画面のテンプレートファイルになります。<ion-slides>の中に<ion-slide>が10件含まれていることがわかります。

home.page.html

<ion-header [translucent]="true">
  <ion-toolbar>
    <ion-title> スライド </ion-title>
  </ion-toolbar>
</ion-header>

<ion-content [fullscreen]="true">
  <!-- スライドが10枚ある -->
  <ion-slides #slides>
    <ion-slide>
      <app-page-one></app-page-one>
    </ion-slide>
    <ion-slide>
      <app-page-two></app-page-two>
    </ion-slide>
    <ion-slide>
      <app-page-three></app-page-three>
    </ion-slide>
    <ion-slide>
      <app-page-four></app-page-four>
    </ion-slide>
    <ion-slide>
      <app-page-five></app-page-five>
    </ion-slide>
    <ion-slide>
      <app-page-six></app-page-six>
    </ion-slide>
    <ion-slide>
      <app-page-seven></app-page-seven>
    </ion-slide>
    <ion-slide>
      <app-page-eight></app-page-eight>
    </ion-slide>
    <ion-slide>
      <app-page-nine></app-page-nine>
    </ion-slide>
    <ion-slide>
      <app-page-ten></app-page-ten>
    </ion-slide>
  </ion-slides>
  <ion-button (click)="swipeNext()" expand="block">次のスライド</ion-button>
  <ion-button (click)="swipePrev()" expand="block">前のスライド</ion-button>
</ion-content>

10枚のスライドを表示する画面のコンポーネントクラスになります。

home.page.ts

import { Component, ViewChild } from '@angular/core';
import { IonSlides } from '@ionic/angular';

/**
 * スライドを10枚表示する画面
 *
 * @export
 * @class HomePage
 */
@Component({
  selector: 'app-home',
  templateUrl: 'home.page.html',
  styleUrls: ['home.page.scss'],
})
export class HomePage {
  @ViewChild('slides') slides: IonSlides;

  constructor() {}

  /**
   * 次のスライドに進む
   *
   * @memberof HomePage
   */
  public swipeNext(): void {
    this.slides.slideNext();
  }

  /**
   * 前のスライドに戻る
   *
   * @memberof HomePage
   */
  public swipePrev(): void {
    this.slides.slidePrev();
  }
}

スライドのパフォーマンスを改善する方法

搭載しているスライドの枚数が多いスライドのパフォーマンスを改善する方法について説明します。今回、説明する方法は下記の二つです。

  • 案1: バーチャルスライド

    • Angularのバーチャルスクロール機能のように、現在表示している部分のみDOM要素を生成することによって、一度に生成するDOM要素を減らし、パフォーマンスを改善します。具体的には、現在表示しているスライドとその前後のスライドだけをDOM要素として生成するようにします
  • 案2: Lazy Loading(遅延読み込み)

    • 一度に全てのスライドを表示しようとするのではなく、最初に表示する必要のあるスライドだけを先に表示して、残りのスライドは遅延させながら徐々に表示させることでパフォーマンスへの負担を減らすという方式になります

案1: バーチャルスライド

先ほどのサンプルアプリのコードを修正して、パフォーマンスの改善について説明します。まずはバーチャルスライド方式から

home.page.html

<ion-header [translucent]="true">
  <ion-toolbar>
    <ion-title> スライド </ion-title>
  </ion-toolbar>
</ion-header>

<ion-content [fullscreen]="true">
  <!-- スライドが10枚ある -->
  <ion-slides
    #slides
    (ionSlideNextEnd)="loadNext()"
    (ionSlidePrevEnd)="loadPrev()"
  >
    <ion-slide>
      <app-page-one *ngIf="isVisibleSlide[0]"></app-page-one>
    </ion-slide>
    <ion-slide>
      <app-page-two *ngIf="isVisibleSlide[1]"></app-page-two>
    </ion-slide>
    <ion-slide>
      <app-page-three *ngIf="isVisibleSlide[2]"></app-page-three>
    </ion-slide>
    <ion-slide>
      <app-page-four *ngIf="isVisibleSlide[3]"></app-page-four>
    </ion-slide>
    <ion-slide>
      <app-page-five *ngIf="isVisibleSlide[4]"></app-page-five>
    </ion-slide>
    <ion-slide>
      <app-page-six *ngIf="isVisibleSlide[5]"></app-page-six>
    </ion-slide>
    <ion-slide>
      <app-page-seven *ngIf="isVisibleSlide[6]"></app-page-seven>
    </ion-slide>
    <ion-slide>
      <app-page-eight *ngIf="isVisibleSlide[7]"></app-page-eight>
    </ion-slide>
    <ion-slide>
      <app-page-nine *ngIf="isVisibleSlide[8]"></app-page-nine>
    </ion-slide>
    <ion-slide>
      <app-page-ten *ngIf="isVisibleSlide[9]"></app-page-ten>
    </ion-slide>
  </ion-slides>
  <ion-button (click)="swipeNext()" expand="block">次のスライド</ion-button>
  <ion-button (click)="swipePrev()" expand="block">前のスライド</ion-button>
</ion-content>

*ngIf="isVisibleSlide[${スライドのインデックス}]"を追加することで、フラグの配列によるスライドの表示・非表示の機能を追加しました。

home.page.ts

import { Component, ViewChild, OnInit } from '@angular/core';
import { IonSlides } from '@ionic/angular';

/**
 * スライドを10枚表示する画面
 *
 * @export
 * @class HomePage
 */
@Component({
  selector: 'app-home',
  templateUrl: 'home.page.html',
  styleUrls: ['home.page.scss'],
})
export class HomePage implements OnInit {
  @ViewChild('slides') slides: IonSlides;
  // スライドの表示フラグ
  public isVisibleSlide: boolean[];
  // スライドの枚数
  private readonly numberOfSlides = 10;

  constructor() {}

  public async ngOnInit(): Promise<void> {
    // 全てのスライドを非表示にする
    this.isVisibleSlide = Array(this.numberOfSlides).fill(false);
    this.initShowSlides();
  }

  /**
   * 次のスライドに進む
   *
   * @memberof HomePage
   */
  public swipeNext(): void {
    this.slides.slideNext();
  }

  /**
   * 前のスライドに戻る
   *
   * @memberof HomePage
   */
  public swipePrev(): void {
    this.slides.slidePrev();
  }

  /**
   * スライドを進んだ時に呼び出される
   *
   * @returns {Promise<void>}
   * @memberof HomePage
   */
  public async loadNext(): Promise<void> {
    await this.showNextSlide();
  }

  /**
   * スライドを戻った時に呼び出される
   *
   * @returns {Promise<void>}
   * @memberof HomePage
   */
  public async loadPrev(): Promise<void> {
    await this.showPrevSlide();
  }

  /**
   * 初期処理として1番目と2番目のスライドを表示する
   *
   * @private
   * @memberof HomePage
   */
  private initShowSlides(): void {
    this.isVisibleSlide[0] = true;
    this.isVisibleSlide[1] = true;
  }

  /**
   * 前方向のスライド移動に伴い、スライドの表示・非表示を切り替える。
   *
   * @private
   * @returns {Promise<void>}
   * @memberof HomePage
   */
  private async showNextSlide(): Promise<void> {
    const index = await this.slides.getActiveIndex();
    if (index > 1) {
      this.isVisibleSlide[index - 2] = false;
    }
    if (index < this.numberOfSlides - 1) {
      this.isVisibleSlide[index + 1] = true;
    }
  }

  /**
   * 後ろ方向のスライド移動に伴い、スライドの表示・非表示を切り替える。
   *
   * @private
   * @returns {Promise<void>}
   * @memberof HomePage
   */
  private async showPrevSlide(): Promise<void> {
    const index = await this.slides.getActiveIndex();
    if (index > 0) {
      this.isVisibleSlide[index - 1] = true;
    }
    if (index < this.numberOfSlides - 2) {
      this.isVisibleSlide[index + 2] = false;
    }
  }
}

スライドの初期表示、スライドを移動するタイミングで、フラグ(isVisibleSlide)を更新することで、現在表示しているスライドとその前後だけ表示の対象にする処理を追加しています。

動作確認

上記のコードを動かして、Chrome DevToolで確認してみます。そうすると、前後と現時点で表示されているスライドしか表示しないことにより、生成するDOMの数を減らし、パフォーマンスを改善できていることがわかります。

f:id:l08084:20210424184720p:plain
4枚目のスライドを表示している時は、3, 4, 5枚目のスライドしか表示されない

上記画像の例では、4枚目のスライドとその前後の3, 5枚目のスライドのみが表示されているため、パフォーマンスへの負荷が減少しています。

案2: Lazy Loading(遅延読み込み)

テンプレートファイル(home.page.html)の内容は、「案1: バーチャルスライド」の時と全く同じ内容でOKです。

続いて、スライド画面のコンポーネントクラスについては、下記のようにスライドの表示フラグを徐々にtrueにしていくメソッドを使用して、擬似的にスライド画面のLazy Loadingを実現しています。

home.page.ts

import { Component, ViewChild, OnInit } from '@angular/core';
import { IonSlides } from '@ionic/angular';
import { interval, Subscription } from 'rxjs';

/**
 * スライドを10枚表示する画面
 *
 * @export
 * @class HomePage
 */
@Component({
  selector: 'app-home',
  templateUrl: 'home.page.html',
  styleUrls: ['home.page.scss'],
})
export class HomePage implements OnInit {
  @ViewChild('slides') slides: IonSlides;
  // スライドの表示フラグ
  public isVisibleSlide: boolean[];
  // スライドの枚数
  private readonly numberOfSlides = 10;
  private visibleSlidesCallbackInterbal: Subscription;

  constructor() {}

  public async ngOnInit(): Promise<void> {
    // 全てのスライドを非表示にする
    this.isVisibleSlide = Array(this.numberOfSlides).fill(false);
    this.lazyLodingSlides();
  }

  public ngOnDestroy(): void {
    this.visibleSlidesCallbackInterbal.unsubscribe();
  }

  /**
   * 次のスライドに進む
   *
   * @memberof HomePage
   */
  public swipeNext(): void {
    this.slides.slideNext();
  }

  /**
   * 前のスライドに戻る
   *
   * @memberof HomePage
   */
  public swipePrev(): void {
    this.slides.slidePrev();
  }

  /**
   * スライドを徐々に表示していく
   *
   * @private
   * @memberof HomePage
   */
  private lazyLodingSlides(): void {
    this.isVisibleSlide[0] = true;
    this.isVisibleSlide[1] = true;
    let counter = 2;
    this.visibleSlidesCallbackInterbal = interval(500).subscribe(() => {
      if (counter === this.numberOfSlides) {
        this.visibleSlidesCallbackInterbal.unsubscribe();
        return;
      }
      this.isVisibleSlide[counter++] = true;
    });
  }
}

おわりに

パフォーマンス改善の効果がより高いのは、「案1: バーチャルスライド」の方だと思うのですが、スライドを消したり表示したりする仕様上、デグレーションによるバグが発生しやすいように思えます。

その点、「案2: Lazy Loading(遅延読み込み)」についてはデグレーションによるバグが発生する可能性が案1よりも少なくすみそうです。

参考サイト

Ion-Slides: Mobile Touch Slider with Built-In & Custom Animation

ionic framework - How to slide manually to the next slide in ion-slide - Stack Overflow

Angular 7正式版リリース。バーチャルスクロール、ドラッグ&ドロップのサポートなど、6カ月ぶりのメジャーバージョンアップ - Publickey

【Angular】ngIf と hidden の個人的な使い分け - 開発覚書はてな版

Angular Material UI component library

RxJS

【Ionic v5】Alert/Modal同士でz-indexを交換する

環境

TypeScriptベースのフレームワークであるAngularと、iOS/AndroidのハイブリッドモバイルアプリケーションのフレームワークであるIonicを使用しています。

  • "rxjs": "~6.6.0",
  • "@angular/fire": "^6.1.4"
  • "firebase": "^8.3.1"
  • "semver": "^7.3.5"

ionic infoコマンドの実行結果

$ ionic info

Ionic:

   Ionic CLI                     : 6.11.8 (/usr/local/lib/node_modules/@ionic/cli)
   Ionic Framework               : @ionic/angular 5.6.0
   @angular-devkit/build-angular : 0.1101.4
   @angular-devkit/schematics    : 11.1.4
   @angular/cli                  : 11.1.4
   @ionic/angular-toolkit        : 3.1.0

Cordova:

   Cordova CLI       : 8.0.0
   Cordova Platforms : none
   Cordova Plugins   : no whitelisted plugins (1 plugins total)

Utility:

   cordova-res : not installed
   native-run  : not installed

System:

   ios-deploy : 1.9.2
   ios-sim    : 6.1.2
   NodeJS     : v12.13.1 (/usr/local/bin/node)
   npm        : 6.14.12
   OS         : macOS Catalina
   Xcode      : Xcode 12.0.1 Build version 12A7300

Alert/Modal同士でz-indexを交換する

Ionicのアラート/モーダルはz-indexを交換することができるため、アラート/モーダル同士の奥行きの位置を入れ替えることができます。

  /**
   * アラート/モーダルの奥行きの位置を交換する
   *
   * @private
   * @memberof VersionCheckService
   */
  private swapPositions(): void {
    [this.versionUpAlert.style.zIndex, this.maintenanceAlert.style.zIndex] = [
      this.maintenanceAlert.style.zIndex,
      this.versionUpAlert.style.zIndex,
    ];
  }

例えば、下記の画像では、バージョンアップのアラートとメンテナンスのアラートが重なって表示されていて、あとに表示されたバージョンアップのアラートが前面に表示されています。

f:id:l08084:20210411161642p:plain
バージョンアップのアラートが前面に表示されている

この状態で先ほど作成したswapPositions()を呼び出すと、アラートの位置が交換されて、メンテナンスのアラートが前面に表示されます。(隠れて見えませんが背後にバージョンアップのアラートが表示されています)

f:id:l08084:20210411163147p:plain
メンテナンスのアラートが前に来る

該当コードの全体像は下記となります。

import { Injectable } from '@angular/core';
import { AngularFireDatabase } from '@angular/fire/database';
import { Observable } from 'rxjs';
import { Maintenance } from '../model/maintenance.model';
import { Version } from '../model/version.model';
import * as semver from 'semver';
import { AlertController } from '@ionic/angular';
@Injectable({
  providedIn: 'root',
})
export class VersionCheckService {
  // このアプリのバージョン
  private readonly appVersion = '1.0.0';

  private maintenance$: Observable<Maintenance>;
  private version$: Observable<Version>;
  private maintenanceAlert: HTMLIonAlertElement;
  private versionUpAlert: HTMLIonAlertElement;

  constructor(
    private db: AngularFireDatabase,
    private alertController: AlertController
  ) {}

  /**
   * 初期設定
   *
   * @memberof VersionCheckService
   */
  public initSetting(): void {
    // Realtime Databaseからデータを取得
    this.maintenance$ = this.db
      .object<Maintenance>('maintenance')
      .valueChanges();
    this.version$ = this.db.object<Version>('version').valueChanges();

    this.maintenance$.subscribe(
      async (maintenance: Maintenance) =>
        await this.checkMaintenance(maintenance)
    );
    this.version$.subscribe(
      async (version: Version) =>
        await this.checkVersion(this.appVersion, version)
    );
  }

  /**
   * メンテナンスポップアップを表示する。
   *
   * @private
   * @param {Maintenance} maintenance
   * @returns {Promise<void>}
   * @memberof VersionCheckService
   */
  private async checkMaintenance(maintenance: Maintenance): Promise<void> {
    if (!maintenance) {
      return;
    }

    if (!maintenance.maintenanceFlg) {
      // メンテナンスフラグがOFFだったら処理を中断する
      if (this.maintenanceAlert) {
        // メンテナンスメッセージが開かれている場合は閉じる
        await this.maintenanceAlert.dismiss();
        this.maintenanceAlert = undefined;
      }
      return;
    }

    // メンテナンスメッセージを表示する
    this.maintenanceAlert = await this.alertController.create({
      header: maintenance.title,
      message: maintenance.message,
      backdropDismiss: false, // 背景をクリックしても閉じない
    });
    await this.maintenanceAlert.present();
  }

  /**
   * 強制バージョンアップメッセージを表示する。
   *
   * @private
   * @param {string} appVersion
   * @param {Version} version
   * @returns
   * @memberof VersionCheckService
   */
  private async checkVersion(appVersion: string, version: Version) {
    if (!version || !version.minimumVersion) {
      return;
    }

    if (semver.gte(appVersion, version.minimumVersion)) {
      // 最低バージョンよりもアプリのバージョンが高かったら処理を中断する
      if (this.versionUpAlert) {
        // 強制バージョンアップメッセージが開かれている場合は閉じる
        await this.versionUpAlert.dismiss();
        this.versionUpAlert = undefined;
      }
      return;
    }

    // 強制バージョンアップメッセージを表示する
    this.versionUpAlert = await this.alertController.create({
      header: version.title,
      message: version.message,
      backdropDismiss: false, // 背景をクリックしても閉じない
    });
    await this.versionUpAlert.present();
  }

  /**
   * アラート/モーダルの奥行きの位置を交換する
   *
   * @private
   * @memberof VersionCheckService
   */
  private swapPositions(): void {
    [this.versionUpAlert.style.zIndex, this.maintenanceAlert.style.zIndex] = [
      this.maintenanceAlert.style.zIndex,
      this.versionUpAlert.style.zIndex,
    ];
  }
}

Alert/Modalのz-indexを参照できるのはなぜか?

そもそも、なぜIonicのアラート/モーダルで、z-indexを参照・更新できるのか?という点について説明します。

Ionicのアラートの型はHTMLIonAlertElement、モーダルの型はHTMLIonModalElementに設定されています。

HTMLIonAlertElementHTMLIonModalElementHTMLElementを継承しているため、HTMLElement.styleによって、z-index含むスタイル関連のメソッドやプロパティの情報を取得することができる、というわけです。

おわりに

IonicのコンポーネントってStencilで書かれているWeb Componentsなんですね......知らなかった。コントリビュートしやすそう

参考サイト

ElementCSSInlineStyle.style - Web API | MDN

Stencilを使ってWebComponentを作ってみる - Qiita

Web Components | MDN

Using custom elements - Web Components | MDN

型付きコンポーネント - Stencil

ionic-framework/alert.tsx at 8e0e5da7407adecb7471b3a6b0ac059337761355 · ionic-team/ionic-framework · GitHub

ionic-framework/core/src/components/modal at 8e0e5da7407adecb7471b3a6b0ac059337761355 · ionic-team/ionic-framework · GitHub

【RxJS】Subjectを使って好きなタイミングでデータを流す

はじめに

今回は、前回の記事で作成した強制バージョンアップとメンテナンスのアラートを表示する機能に、下記の機能を追加することでリアクティブ・プログラミング用のライブラリであるRxJSのSubjectの使用方法について説明します。

  • 今回追加する機能
    • 強制バージョンアップのアラートの表示を、メンテナンスのアラートの表示よりも優先する機能
      • メンテナンスのアラートを表示しているときに、強制バージョンアップのアラートを表示する場合は、メンテナンスのアラートを閉じる
      • 強制バージョンアップのアラートを表示している時はメンテナンスのメッセージを表示しない

ちなみに、上記の例だとSubjectを使わなくてもすっきりしたコードが書けます。まあ、RxJSの勉強ということで。。。

環境

TypeScriptベースのフレームワークであるAngularと、iOS/AndroidのハイブリッドモバイルアプリケーションのフレームワークであるIonicを使用しています。

  • "rxjs": "~6.6.0",
  • "@angular/fire": "^6.1.4"
  • "firebase": "^8.3.1"
  • "semver": "^7.3.5"

ionic infoコマンドの実行結果

$ ionic info

Ionic:

   Ionic CLI                     : 6.11.8 (/usr/local/lib/node_modules/@ionic/cli)
   Ionic Framework               : @ionic/angular 5.6.0
   @angular-devkit/build-angular : 0.1101.4
   @angular-devkit/schematics    : 11.1.4
   @angular/cli                  : 11.1.4
   @ionic/angular-toolkit        : 3.1.0

Cordova:

   Cordova CLI       : 8.0.0
   Cordova Platforms : none
   Cordova Plugins   : no whitelisted plugins (1 plugins total)

Utility:

   cordova-res : not installed
   native-run  : not installed

System:

   ios-deploy : 1.9.2
   ios-sim    : 6.1.2
   NodeJS     : v12.13.1 (/usr/local/bin/node)
   npm        : 6.14.12
   OS         : macOS Catalina
   Xcode      : Xcode 12.0.1 Build version 12A7300

アラート表示の実装

前回の記事で作成した強制バージョンアップとメンテナンスのアラートを表示する実装です。

この実装にSubjectを使用して、強制バージョンアップのアラートの表示を、メンテナンスのアラートの表示よりも優先する機能を付けていきます。

src/app/services/version-check.service.ts

import { Injectable } from '@angular/core';
import { AngularFireDatabase } from '@angular/fire/database';
import { Observable } from 'rxjs';
import { Maintenance } from '../model/maintenance.model';
import { Version } from '../model/version.model';
import * as semver from 'semver';
import { AlertController } from '@ionic/angular';
@Injectable({
  providedIn: 'root',
})
export class VersionCheckService {
  // このアプリのバージョン
  private readonly appVersion = '1.0.0';

  private maintenance$: Observable<Maintenance>;
  private version$: Observable<Version>;
  private maintenanceAlert: HTMLIonAlertElement;
  private versionUpAlert: HTMLIonAlertElement;

  constructor(
    private db: AngularFireDatabase,
    private alertController: AlertController
  ) {}

  /**
   * 初期設定
   *
   * @memberof VersionCheckService
   */
  public initSetting(): void {
    // Realtime Databaseからデータを取得
    this.maintenance$ = this.db
      .object<Maintenance>('maintenance')
      .valueChanges();
    this.version$ = this.db.object<Version>('version').valueChanges();

    this.maintenance$.subscribe(
      async (maintenance: Maintenance) =>
        await this.checkMaintenance(maintenance)
    );
    this.version$.subscribe(
      async (version: Version) =>
        await this.checkVersion(this.appVersion, version)
    );
  }

  /**
   * メンテナンスポップアップを表示する。
   *
   * @private
   * @param {Maintenance} maintenance
   * @returns {Promise<void>}
   * @memberof VersionCheckService
   */
  private async checkMaintenance(maintenance: Maintenance): Promise<void> {
    if (!maintenance) {
      return;
    }

    if (!maintenance.maintenanceFlg) {
      // メンテナンスフラグがOFFだったら処理を中断する
      if (this.maintenanceAlert) {
        // メンテナンスメッセージが開かれている場合は閉じる
        await this.maintenanceAlert.dismiss();
        this.maintenanceAlert = undefined;
      }
      return;
    }

    // メンテナンスメッセージを表示する
    this.maintenanceAlert = await this.alertController.create({
      header: maintenance.title,
      message: maintenance.message,
      backdropDismiss: false, // 背景をクリックしても閉じない
    });
    await this.maintenanceAlert.present();
  }

  /**
   * 強制バージョンアップメッセージを表示する。
   *
   * @private
   * @param {string} appVersion
   * @param {Version} version
   * @returns
   * @memberof VersionCheckService
   */
  private async checkVersion(appVersion: string, version: Version) {
    if (!version || !version.minimumVersion) {
      return;
    }

    if (semver.gte(appVersion, version.minimumVersion)) {
      // 最低バージョンよりもアプリのバージョンが高かったら処理を中断する
      if (this.versionUpAlert) {
        // 強制バージョンアップメッセージが開かれている場合は閉じる
        await this.versionUpAlert.dismiss();
        this.versionUpAlert = undefined;
      }
      return;
    }

    // 強制バージョンアップメッセージを表示する
    this.versionUpAlert = await this.alertController.create({
      header: version.title,
      message: version.message,
      backdropDismiss: false, // 背景をクリックしても閉じない
    });
    await this.versionUpAlert.present();
  }
}

ObservableではなくSubjectが必要になるタイミング

AngularのRxJSを使ってデータの受け渡しをする - Qiita

AngularでObservableを使うとき、もう一つ抑えておきたいクラスがあります。 上記のコードではObservableクラスのインスタンスを作成したタイミングでしかデータを流すことができず、クリックなどのイベントをトリガーとしてデータを処理したいような場合には向いていません。 そんな時に使用するのがSubjectクラスです。 SubjectクラスのインスタンスはObservableとobserverの2つの役割を同時に担うことができ、任意のタイミングでデータを流すことができます。

上記の記事で記載されている通り、SubjectはObservableと違って、next()メソッドを呼び出すことができるので、任意のタイミングでデータを流すことができます。

メンテナンスよりも強制バージョンアップのアラートを優先して表示する

さて、Subjectを使用して、メンテナンスのアラートを表示しているときに、強制バージョンアップのアラートを表示する場合は、メンテナンスのアラートを閉じる機能を実装するには、下記のようにする必要があります。

  • 強制バージョンアップのアラートが表示されたときには、Subject(isShowVersionUpAlert)のnext(true)を呼び出してストリームにtrueの値を流す
  • 強制バージョンアップのアラートが閉じたときには、Subject(isShowVersionUpAlert)のnext(false)を呼び出してストリームにfalseの値を流す
  • 下記の処理でストリームに流された値を受け取る
    this.isShowVersionUpAlert
      .pipe(
        filter(
          (isShowVersionUp: boolean) =>
            isShowVersionUp && !!this.maintenanceAlert
        )
      )
      .subscribe(async () => {
        await this.maintenanceAlert.dismiss();
        this.maintenanceAlert = undefined;
      });

上記の処理では、Subject(isShowVersionUpAlert)ストリームにデータが流れたときに、強制バージョンアップが表示されている(isShowVersionUp=true) かつ、メンテナンスアラートが表示されている(!!this.maintenanceAlert=true)場合は、メンテナンスのアラートを閉じるという処理をしています。

上記の処理を追加した、コードの全体像は下記のようになります。

src/app/services/version-check.service.ts

import { Injectable } from '@angular/core';
import { AngularFireDatabase } from '@angular/fire/database';
import { Observable, Subject } from 'rxjs';
import { Maintenance } from '../model/maintenance.model';
import { Version } from '../model/version.model';
import * as semver from 'semver';
import { AlertController } from '@ionic/angular';
import { filter } from 'rxjs/operators';

@Injectable({
  providedIn: 'root',
})
export class VersionCheckService {
  private readonly appVersion = '1.0.0';

  private maintenance$: Observable<Maintenance>;
  private version$: Observable<Version>;
  private maintenanceAlert: HTMLIonAlertElement;
  private versionUpAlert: HTMLIonAlertElement;

  // add this!
  private isShowVersionUpAlert = new Subject<boolean>();

  constructor(
    private db: AngularFireDatabase,
    private alertController: AlertController
  ) {}

  /**
   * 初期設定
   *
   * @memberof VersionCheckService
   */
  public initSetting(): void {
    this.maintenance$ = this.db
      .object<Maintenance>('maintenance')
      .valueChanges();
    this.version$ = this.db.object<Version>('version').valueChanges();

    this.maintenance$.subscribe(
      async (maintenance: Maintenance) =>
        await this.checkMaintenance(maintenance)
    );
    this.version$.subscribe(
      async (version: Version) =>
        await this.checkVersion(this.appVersion, version)
    );

    // add this!
    this.isShowVersionUpAlert
      .pipe(
        filter(
          (isShowVersionUp: boolean) =>
            isShowVersionUp && !!this.maintenanceAlert
        )
      )
      .subscribe(async () => {
        await this.maintenanceAlert.dismiss();
        this.maintenanceAlert = undefined;
      });
  }

  /**
   * メンテナンスポップアップを表示する。
   *
   * @private
   * @param {Maintenance} maintenance
   * @returns {Promise<void>}
   * @memberof VersionCheckService
   */
  private async checkMaintenance(maintenance: Maintenance): Promise<void> {
    if (!maintenance) {
      return;
    }

    // add conditions '|| !!this.versionUpAlert'
    if (!maintenance.maintenanceFlg || !!this.versionUpAlert) {
      if (this.maintenanceAlert) {
        await this.maintenanceAlert.dismiss();
        this.maintenanceAlert = undefined;
      }
      return;
    }

    this.maintenanceAlert = await this.alertController.create({
      header: maintenance.title,
      message: maintenance.message,
      backdropDismiss: false,
    });
    await this.maintenanceAlert.present();
  }

  /**
   * 強制バージョンアップメッセージを表示する。
   *
   * @private
   * @param {string} appVersion
   * @param {Version} version
   * @returns
   * @memberof VersionCheckService
   */
  private async checkVersion(appVersion: string, version: Version) {
    if (!version || !version.minimumVersion) {
      return;
    }

    if (semver.gte(appVersion, version.minimumVersion)) {
      if (this.versionUpAlert) {
        await this.versionUpAlert.dismiss();
        this.versionUpAlert = undefined;

        // add this!
        this.isShowVersionUpAlert.next(false);
      }
      return;
    }

    this.versionUpAlert = await this.alertController.create({
      header: version.title,
      message: version.message,
      backdropDismiss: false,
    });

    // add this!
    this.isShowVersionUpAlert.next(true);

    await this.versionUpAlert.present();
  }
}

動作確認

上記のコードを実際に動かしてみます。

まず、メンテナンスのアラートを表示します。

f:id:l08084:20210404155530p:plain
メンテナンスのアラートが表示されている

続いて、強制バージョンアップのアラートを表示すると、メンテナンスのアラートが閉じて、強制バージョンアップのアラートだけが表示されることがわかります。期待結果通りの動きです。

f:id:l08084:20210404155604p:plain
強制バージョンアップのアラートだけが表示される

おまけ: どうしてSubjectにasObservableが必要なのか

上記の実装をしている時に、SubjcetにasObservable()メソッドが用意されているのはなぜなのか?という疑問を持ちました。

asObservable()はSubjectをObservableに変換するメソッドですが、Subjectは元々Observableの機能を持っているため、SubjectからObservableに変換する意味がわからなかったためです。

Why asObservable with Subjects?. When I started learning angular I read… | by Mamta Bisht | Medium

この疑問を解消するのに、上記の記事の解説が参考になりました。

SubjectからasObservable()を呼び出してObservableに変換するのは、機能を制限するため、とのことです。

Subjectを他クラスに渡すときなどに、そのまま渡すとnext()メソッドが使えるので、他のクラスからも値を流すことが可能になってしまい、意図していない値の流され方をされてしまうかもしれません。

そのような事態を防ぐために、asObservable()でSubjectをObservableに変換してnext()メソッドを使えない状態にしてから渡したほうが良い、とのことでした。

参考

Why asObservable with Subjects?. When I started learning angular I read… | by Mamta Bisht | Medium

[Angular] サービスを使用してデータをコンポーネント間で共有する - Qiita

AngularのRxJSを使ってデータの受け渡しをする - Qiita

RxJS を学ぼう #5 – Subject について学ぶ / Observable × Observer – PSYENCE:MEDIA

Angular + Firebase Realtime Databaseでメンテナンスと強制バージョンアップのポップアップを表示する

はじめに

今回は、Angular(Ionic)で作ったアプリからFirebase Realtime Databaseを参照して、メンテナンスと強制バージョンアップを知らせるポップアップを表示する機能を作成します。

Firebaseが提供しているデータベースについて

まず、Firebaseが提供している二つのデータベースの違いについて説明します。

  • Cloud Firestore
    • データをドキュメントのコレクションとして扱う。多彩なクエリを使えるため検索に強く、Realtime Databaseよりも複雑で階層的なデータを扱いやすい
  • Realtime Database
    • データを単一のJSONツリーとして扱う。Cloud Firestoreよりもレイテンシーが低いため、データの同期が早い

Realtime Databaseではなく、基本的に後続サービスのCloud Firestoreを使ってください、と書かれている記事が多かったんですが、今回はデータのread/writeのスピードがより早いRealtime Databaseを採用します。

環境

TypeScriptベースのフレームワークであるAngularと、iOS/AndroidのハイブリッドモバイルアプリケーションのフレームワークであるIonicを使用しています。

  • "@angular/fire": "^6.1.4"
  • "firebase": "^8.3.1"
  • "semver": "^7.3.5"

ionic infoコマンドの実行結果

$ ionic info

Ionic:

   Ionic CLI                     : 6.11.8 (/usr/local/lib/node_modules/@ionic/cli)
   Ionic Framework               : @ionic/angular 5.6.0
   @angular-devkit/build-angular : 0.1101.4
   @angular-devkit/schematics    : 11.1.4
   @angular/cli                  : 11.1.4
   @ionic/angular-toolkit        : 3.1.0

Cordova:

   Cordova CLI       : 8.0.0
   Cordova Platforms : none
   Cordova Plugins   : no whitelisted plugins (1 plugins total)

Utility:

   cordova-res : not installed
   native-run  : not installed

System:

   ios-deploy : 1.9.2
   ios-sim    : 6.1.2
   NodeJS     : v12.13.1 (/usr/local/bin/node)
   npm        : 6.14.12
   OS         : macOS Catalina
   Xcode      : Xcode 12.0.1 Build version 12A7300

環境構築

環境構築をしていきます。Firebaseのプロジェクトを作成した後、今回はWebアプリを作成するため、プラットフォームのウェブのアプリを追加します。

f:id:l08084:20210327175441p:plain
Firebaseのプロジェクトを作成する

続いて、プラットフォーム「ウェブアプリ」のSDKスニペットのfirebaseConfigの内容をAngular(Ionic)プロジェクトのsrc/environments/environment.tsに転記します。

f:id:l08084:20210327180409p:plain
編集後のenvironment.ts

AngularからFirebaseに接続する用途のライブラリである、AngularFireをnpmインストールします。

今回作成しているアプリはAngular CLIから作ったプロジェクトではなく、AngularベースのIonicプロジェクトであるため、公式が推奨しているng addコマンドではなく、下記のコマンドを使用します。

npm i firebase @angular/fire

app.module.tsimports: []AngularFireModule.initializeApp(environment.firebaseConfig)を追加します。

app.module.ts

import { AngularFireModule } from '@angular/fire';
import { environment } from 'src/environments/environment';
@NgModule({
  // ...省略
  imports: [
    // add this
    AngularFireModule.initializeApp(environment.firebaseConfig),
  ],
})
export class AppModule {}

強制バージョンアップメッセージの表示判定に使用する、セマンティック バージョニングを比較することができるライブラリ、node-semverもインストールします。

npm i semver

補足

今回はブラウザ上でしかアプリを動かさないので使えませんが、モバイルアプリ(iOS/Android)としても動かすときは、アプリバージョンを取得するライブラリであるcordova-plugin-app-versionを使ったりします。

ionic cordova plugin add cordova-plugin-app-version
npm i @ionic-native/app-version
npm i @ionic-native/core

Realtime Databaseのデータ構造を構築する

Realtime Databaseのデータ構造をJSONファイルとして作成します。

今回は、メンテナンスと強制バージョンアップのポップアップを表示したいので、下記のような構造のJSONファイルにしました。

{
  "maintenance": {
    "maintenanceFlg": false,
    "message": "メンテナンスのため一時サービスを停止しております。<br/>しばらくお待ちください。",
    "title": "メンテナンス"
  },
  "version": {
    "message": "最新版のアプリがリリースされました。<br/>バージョンアップをお願いいたします。",
    "minimumVersion": "0.0.3",
    "title": "バージョンアップ"
  }
}

上記で作成したJSONファイルをRealtime Databaseにインポートします。

f:id:l08084:20210329162221p:plain
「JSONをインポート」を選択する

JSONファイルをインポートすると、下記画像のように、Realtime Database上にデータ構造が作成されることを確認できます。

f:id:l08084:20210329162340p:plain
JSONインポート後のRealtime Database

メンテナンスと強制バージョンアップのポップアップを表示する

作成したRealtime Databaseのデータ構造を使って、ポップアップを表示するサービスクラスVersionCheckServiceを作成していきます。

src/app/services/version-check.service.ts

import { Injectable } from '@angular/core';
import { AngularFireDatabase } from '@angular/fire/database';
import { Observable } from 'rxjs';
import { Maintenance } from '../model/maintenance.model';
import { Version } from '../model/version.model';
import * as semver from 'semver';
import { AlertController } from '@ionic/angular';
@Injectable({
  providedIn: 'root',
})
export class VersionCheckService {
  // このアプリのバージョン
  private readonly appVersion = '1.0.0';

  private maintenance$: Observable<Maintenance>;
  private version$: Observable<Version>;
  private maintenanceAlert: HTMLIonAlertElement;
  private versionUpAlert: HTMLIonAlertElement;

  constructor(
    private db: AngularFireDatabase,
    private alertController: AlertController
  ) {}

  /**
   * 初期設定
   *
   * @memberof VersionCheckService
   */
  public initSetting(): void {
    // Realtime Databaseからデータを取得
    this.maintenance$ = this.db
      .object<Maintenance>('maintenance')
      .valueChanges();
    this.version$ = this.db.object<Version>('version').valueChanges();

    this.maintenance$.subscribe(
      async (maintenance: Maintenance) =>
        await this.checkMaintenance(maintenance)
    );
    this.version$.subscribe(
      async (version: Version) =>
        await this.checkVersion(this.appVersion, version)
    );
  }

  /**
   * メンテナンスポップアップを表示する。
   *
   * @private
   * @param {Maintenance} maintenance
   * @returns {Promise<void>}
   * @memberof VersionCheckService
   */
  private async checkMaintenance(maintenance: Maintenance): Promise<void> {
    if (!maintenance) {
      return;
    }

    if (!maintenance.maintenanceFlg) {
      // メンテナンスフラグがOFFだったら処理を中断する
      if (this.maintenanceAlert) {
        // メンテナンスメッセージが開かれている場合は閉じる
        await this.maintenanceAlert.dismiss();
        this.maintenanceAlert = undefined;
      }
      return;
    }

    // メンテナンスメッセージを表示する
    this.maintenanceAlert = await this.alertController.create({
      header: maintenance.title,
      message: maintenance.message,
      backdropDismiss: false, // 背景をクリックしても閉じない
    });
    await this.maintenanceAlert.present();
  }

  /**
   * 強制バージョンアップメッセージを表示する。
   *
   * @private
   * @param {string} appVersion
   * @param {Version} version
   * @returns
   * @memberof VersionCheckService
   */
  private async checkVersion(appVersion: string, version: Version) {
    if (!version || !version.minimumVersion) {
      return;
    }

    if (semver.gte(appVersion, version.minimumVersion)) {
      // 最低バージョンよりもアプリのバージョンが高かったら処理を中断する
      if (this.versionUpAlert) {
        // 強制バージョンアップメッセージが開かれている場合は閉じる
        await this.versionUpAlert.dismiss();
        this.versionUpAlert = undefined;
      }
      return;
    }

    // 強制バージョンアップメッセージを表示する
    this.versionUpAlert = await this.alertController.create({
      header: version.title,
      message: version.message,
      backdropDismiss: false, // 背景をクリックしても閉じない
    });
    await this.versionUpAlert.present();
  }
}

メンテナンスメッセージ用のクラスを作成します。

src/app/model/maintenance.model.ts

export interface Maintenance {
  maintenanceFlg: boolean;
  message: string;
  title: string;
}

強制バージョンアップメッセージ用のクラスを作成します。

src/app/model/version.model.ts

export interface Version {
  message: string;
  minimumVersion: string;
  title: string;
}

最後にAppComponentからVersionCheckServiceからinitSetting()を呼び出してあげれば実装は終了です。

src/app/app.component.ts

// ...省略
export class AppComponent implements OnInit {
  constructor(private versionCheckService: VersionCheckService) {}

  public ngOnInit(): void {
    this.versionCheckService.initSetting();
  }
}

動作確認

上記で作成したコードの動作確認をします。

メンテナンスメッセージの表示

Realtime Database上のmaintenanceFlgtrueに書き換えると、アプリ上でメンテナンスメッセージが表示されます。

f:id:l08084:20210329162506p:plain
maintenanceFlgをtrueに書き換える

f:id:l08084:20210329160227p:plain
アプリ上でメンテナンスメッセージが表示される

強制バージョンアップメッセージの表示

アプリのバージョン(1.0.0)よりも大きいバージョンを、Realtime Database上のminimumVersionに上書くと、アプリ上で強制バージョンアップメッセージが表示されます。

f:id:l08084:20210329160822p:plain
minimumVersionの値を書き換える

f:id:l08084:20210329160902p:plain
強制バージョンアップメッセージが表示される

参考サイト

データベースを選択: Cloud Firestore または Realtime Database  |  Firebase

GitHub - angular/angularfire: The official Angular library for Firebase.

App Version - Ionic Documentation

GitHub - npm/node-semver: The semver parser for node (the one npm uses)

GitHub - ionic-team/ionic-native: Native features for mobile apps built with Cordova/PhoneGap and open web technologies. Complete with TypeScript support. The successor to ngCordova. Pairs exquisitely with a nice bottle of Ionic Framework.

The target entry-point -has missing dependencies: - Ionic Native - Ionic Forum

TypeScript eqの例、semver.eq TypeScriptの例 - HotExamples

ion-alert: Ionic Framework API Docs

セマンティック バージョニング 2.0.0 | Semantic Versioning