前回の記事はこちら
引き続き、AngularとFirebaseを使って認証機能を作成していきます。
前回ではFirebaseコンソールで認証機能を有効化したあと、AngularプロジェクトにAngularFireをインストールするところまで実施しました。
今回の記事では、AppModuleの設定とログイン画面の作成(ガワだけ)までをやっていきます。
Angularプロジェクトのセットアップ
AppModuleのimports:[]に前回編集した設定ファイルとAngularFireを追記します。
- src/app/app.module.ts
// ...省略
import { AppRoutingModule } from './app-routing.module';

// 設定ファイル
import { environment } from './../environments//environment';

// AngularFire
import { AngularFireModule } from '@angular/fire';
import { AngularFireAuthModule } from '@angular/fire/auth';

@NgModule({
  // ...省略
  imports: [
    // ...省略
    AppRoutingModule,
    // ..追加
    AngularFireModule.initializeApp(environment.firebaseConfig),
    AngularFireAuthModule
  ],
  providers: [],
  bootstrap: [AppComponent]
})
export class AppModule {}
ログイン画面の作成
まずログイン画面の見た目から作っていきます。
CSSフレームワークのAngular Materialを使用しました。
- login.component.html
<app-header></app-header>
<div class="wrapper">
  <mat-card class="login-card">
    <mat-card-header>
      <mat-card-title class="login-title">taikin</mat-card-title>
    </mat-card-header>
    <mat-card-content>
      <form (ngSubmit)="onSubmit()" class="login-form" [formGroup]="loginFormGroup">
        <mat-form-field>
          <input matInput placeholder="email" id="email" formControlName="email" required>
          <mat-error *ngIf="emailControl.invalid">{{getErrorMessageToEmail()}}</mat-error>
        </mat-form-field>

        <mat-form-field>
          <input [type]="hide ? 'password' : 'text'"
            matInput placeholder="password" id="password" formControlName="password" required>
          <mat-icon matSuffix (click)="hide = !hide">{{hide ? 'visibility' : 'visibility_off'}}</mat-icon>
          <mat-error *ngIf="passwordControl.invalid">{{getErrorMessageToPassword()}}</mat-error>
        </mat-form-field>
        <button type="submit" class="login-button" mat-raised-button [disabled]="!loginFormGroup.valid" color="primary">Login</button>
      </form>
    </mat-card-content>
  </mat-card>
</div>
Angularのリアクティブフォームを採用していて、必須バリデーションとメールアドレス形式のバリデーションをかけています。
- login.component.ts
import { Component, OnInit } from '@angular/core';
import {
  FormControl,
  Validators,
  FormGroup,
  FormBuilder
} from '@angular/forms';

/**
 * ログイン画面コンポーネント
 *
 * @export
 * @class LoginComponent
 * @implements {OnInit}
 */
@Component({
  selector: 'app-login',
  templateUrl: './login.component.html',
  styleUrls: ['./login.component.scss']
})
export class LoginComponent implements OnInit {
  // FormGroup定義
  public loginFormGroup: FormGroup;
  // emailフォームのコントロール定義
  public emailControl: FormControl;
  // passwordフォームのコントロール定義
  public passwordControl: FormControl;

  constructor(private fb: FormBuilder) {}

  public ngOnInit() {
    this.createForm();
    this.emailControl = this.loginFormGroup.get('email') as FormControl;
    this.passwordControl = this.loginFormGroup.get('password') as FormControl;
  }

  /**
   * ログインボタン押下時に呼び出し
   *
   */
  public onSubmit() {
    console.log(this.loginFormGroup.value);
    console.log(this.emailControl.value);
    console.log(this.passwordControl.value);
  }

  /**
   * Eメールフォームにバリデーションエラーメッセージを表示
   *
   */
  public getErrorMessageToEmail() {
    return this.emailControl.hasError('required')
      ? 'You must enter a value'
      : this.emailControl.hasError('email')
      ? 'Not a valid email'
      : '';
  }

  /**
   * パスワードフォームにバリデーションエラーメッセージを表示
   *
   */
  public getErrorMessageToPassword() {
    return this.passwordControl.hasError('required')
      ? 'You must enter a value'
      : '';
  }

  /**
   * フォームの設定
   *
   */
  private createForm() {
    this.loginFormGroup = this.fb.group({
      email: ['', [Validators.required, Validators.email]],
      password: ['', [Validators.required]]
    });
  }
}
バリデーションエラーメッセージを返すメソッドを項目(メールアドレスとパスワード)ごとに定義しているのと、フォームの設定とログイン押下時に呼び出されるメソッドの定義をしています。
- login.component.scss
.wrapper {
  display: flex;
  justify-content: center;
  align-items: center;
  margin-top: 15%;

  .login-card {
    width: 500px;
  }

  .login-form {
    display: flex;
    flex-direction: column;

    .login-button {
      margin-top: 20px;
    }
  }

  .login-title {
    font-weight: bold;
    font-size: 22px;
    color: #3f51b5;
  }
}
レイアウトを定義しているSCSSファイル、やっつけなのでレスポンシブなどの考慮はなし。

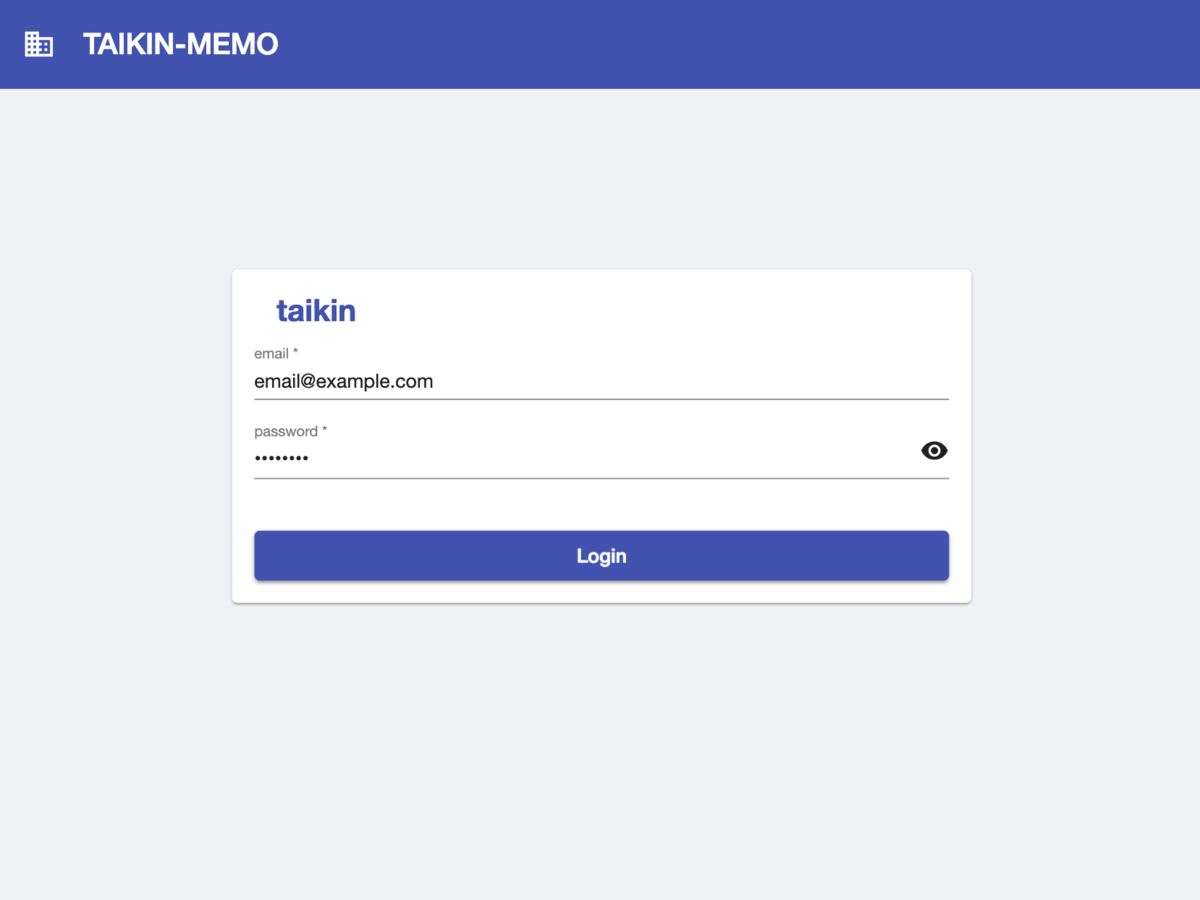
上記のコード(ヘッダーと共通CSSは省略)を実行すると、このようなログイン画面が表示されます。
バージョン情報
- Angular v7.2.0
- firebase: v6.3.4
- Angular Material v7.3.7
次回の記事はこちら