中安拓也のブログ

プログラミングについて書くブログ

Angular + Reduxを学ぶ #1 - selectとdispatchデコレータを使う

f:id:l08084:20180218175432p:plain

はじめに

Reactではなく、AngularからReduxに入門するのは茨の道かと思いますが、やっていきます。 今回はReduxを1サイクル回して、配列を更新してコンポーネントで値を取得するところまでやりました。

開発環境

  • Angular: 5.2.3

  • angular-redux/store: 7.1.0

  • TypeScript: 2.5.3

  • angular/cli: 1.6.5

  • OS: darwin x64

  • Node: 8.1.4

Angular + Redux環境構築手順

まず、Angular CLIを使用してAngularプロジェクトを作成します。

# Install Angular CLI
npm install -g @angular/cli

# Use it to spin up a new app.
ng new [適当なAngularのプロジェクト名]
cd [適当なAngularのプロジェクト名]

angular-redux/storeライブラリをインストール

npm install redux --save @angular-redux/store

flux-standard-actionもインストール

npm install redux --save flux-standard-action

これで環境構築は完了です🎉🎉🎉

コード解説

続いて、コードについて解説していきます。

ReduxをAngularに接続する

まず、app.module.tsでRedux Storeの読み込みを行います。

src/app/app.module.ts:

import { BrowserModule } from '@angular/platform-browser';
import { NgModule } from '@angular/core';

import { AppComponent } from './app.component';

import { NgReduxModule, NgRedux } from '@angular-redux/store';
import { IAppState, INITIAL_STATE } from '../../state/store';
import { TetrisActions } from '../../state/actions';
import { Store, createStore } from 'redux';
import { rootReducer } from '../../state/reducer';

@NgModule({
  declarations: [
    AppComponent
  ],
  imports: [
    BrowserModule,
    NgReduxModule,
  ],
  providers: [
    TetrisActions,
  ],
  bootstrap: [AppComponent]
})
export class AppModule {
  constructor(ngRedux: NgRedux<IAppState>) {
    ngRedux.configureStore(rootReducer,
      INITIAL_STATE);
  }
}

👆のコードで行なっていること

  1. NgReduxModuleをアプリケーションにインポート
  2. Actionの一つであるTetrisActionsをDIできるようにproviders:に設定
  3. Redux StoreをngRedux.configureStoreでAngularに接続

Storeの作成

続いてStoreで、State(状態)のプロパティとStateの初期状態での値を設定しています。 今回の例では、board: number[][]の値を更新します。

src/state/store.ts:

import { Action } from 'redux';
import { TetrisActions, InitBoardAction } from '../state/actions';

export interface IAppState {
    board: number[][];
    lose: boolean;
    current: number[][];
    currentX: number;
    currentY: number;
}

export const INITIAL_STATE: IAppState = {
    board: null,
    lose: false,
    current: null,
    currentX: null,
    currentY: null
};

Actionの作成

src/state/actions.ts:

import { Injectable } from '@angular/core';
import { Action } from 'redux';
import { FluxStandardAction } from 'flux-standard-action';
import { dispatch, NgRedux } from '@angular-redux/store';
import { IAppState } from './store';

export type InitBoardAction = FluxStandardAction<number[][], void>;

@Injectable()
export class TetrisActions {
  static readonly INIT_BOARD = 'INIT_BOARD';

  callInitBoard = (): void => {
    // 2次元配列に0を代入する
    const board = Array.from(new Array(20), () => new Array(10).fill(0));
    this.initBoard(board);
  }

  @dispatch() initBoard = (board: number[][]): InitBoardAction => ({
      type: TetrisActions.INIT_BOARD,
      payload: board,
      meta: undefined
    })
}

actions.tsでは、callInitBoard()で2次元配列boardの全要素に0を設定した後、 initBoard()を呼び出してActionをディスパッチしています。

Actionのディスパッチには、@dispatch()デコレータを使用していて、 InitBoardActionの定義には、環境構築時にインストールしたflux-standard-actionを使用しています。

Reducerの作成

src/state/reducer.ts:

import { IAppState } from './store';
import { Action } from 'redux';
import { TetrisActions, InitBoardAction } from './actions';

export function rootReducer(
    lastState: IAppState,
    action: Action
): IAppState {
    switch (action.type) {
        case TetrisActions.INIT_BOARD:
        return {
            board: (action as InitBoardAction).payload,
            lose: lastState.lose,
            current: lastState.current,
            currentX: lastState.currentX,
            currentY: lastState.currentY
        };
      default:
        return lastState;
    }
}

reducer.tsでは、アクションから取得した配列の値をStateのboardプロパティに設定した後、stateを返す処理を行なっています。

コンポーネント側でStateを取得する

最後にコンポーネントで現在のboard[][]の値を取得して、出力します。 NgRedux Storeでは、StoreからObservableとして値をselect(選択)することによって、最新の値取得を実現しています。

src/app/app.component.ts:

import { Component, ViewChild, AfterViewInit, OnInit, OnDestroy } from '@angular/core';
import { Observable } from 'rxjs/Observable';
import { Subscription } from 'rxjs/Subscription';
import 'rxjs/add/observable/fromEvent';

import { select, NgRedux } from '@angular-redux/store';
import { TetrisActions } from '../../state/actions';
import { IAppState } from '../../state/store';

@Component({
  selector: 'app-root',
  templateUrl: './app.component.html',
  styleUrls: ['./app.component.scss']
})
export class AppComponent implements OnInit, OnDestroy {

  @select() readonly board$: Observable<number[][]>;

  private subscription: Subscription;

  constructor(private tetrisAction: TetrisActions) {
    // boardの新しい値を受け取る
    this.subscription = this.board$.subscribe(console.log);
  }

  ngOnDestroy() {
    this.subscription.unsubscribe();
  }

  ngOnInit() {
    // アクション呼び出し
    this.tetrisAction.callInitBoard();
  }
}

app.component.tsでは、👇2つの処理を行なっています。

  1. ngOnInit()でアクションのcallInitBoard()呼び出し

  2. @selectデコレーターを使用することで、board[][]の最新の値を取得し、console.logで出力

👆👆👆のコードを全部書いた時点でアプリを動作させると、値が更新された状態の2次元配列board[][]が出力されているはずです。

f:id:l08084:20180218184042p:plain

関連サイト

github.com

github.com

Angular + Reduxの公式による解説については下記サイトを参照してください。

store/intro-tutorial.md at master · angular-redux/store · GitHub
TypeScript(Angular)で定数クラス

はじめに

TypeScriptを使って、Javaでいうところの定数クラスを作成したい場合はどうするのが正解なんだろう🤔

開発環境

  • Angular: 5.2.3

  • TypeScript: 2.5.3

  • angular/cli: 1.6.5

  • OS: darwin x64

  • Node: 8.1.4

定数をまとめて定義する方法

案1 定数定義だけ書いたファイルを作成する

constで定義した変数を列挙しただけのファイルsrc/constant.tsを作成する。

src/constant.ts:

export const COLS = 10;
export const ROWS = 20;
export const BOARD_WIDTH = 300;
export const BOARD_HEIGHT = 600;

src/constant.tsから定義した定数を参照するときには、import * as constant from '../constant';という風にしてあげれば良い。

src/app/app.component.ts:

import { Component, OnInit } from '@angular/core';
import * as constant from '../constant';

@Component({
  selector: 'app-root',
  templateUrl: './app.component.html',
  styleUrls: ['./app.component.scss']
})
export class AppComponent implements OnInit {
  ngOnInit() {
    console.log(constant.COLS); // 10
    console.log(constant.ROWS); // 20
    console.log(constant.BOARD_WIDTH); // 300
    console.log(constant.BOARD_HEIGHT); // 600
  }
}
メリット・デメリット

⭕️ コード量が少なく済む

❌ (定数の数が多いと)定数名が長くなりやすい

❌ (定数の数が多いと)エディタの補完を使うときに、候補数が多すぎて選ぶのが大変になる

案2 class定義 + readonlyアクセス修飾子

定数の分類ごとにclassを作成し、その配下に定数を定義したファイル、src/app/myConstant.tsを作成する。

src/app/myConstant.ts:

export class MyConstant {
    public static readonly COLS = 10;
    public static readonly ROWS = 20;
    public static readonly BOARD_WIDTH = 300;
    public static readonly BOARD_HEIGHT = 600;
}

export class MyFavorite {
    public static readonly FOOD = 'ドーナッツ';
    public static readonly ANIMAL = 'モンキー';
}

src/app/myConstant.tsから定義した定数を参照するときには、import { MyConstant, MyFavorite } from './myConstant';という風にしてあげれば良い。

src/app/app.component.ts:

import { Component, OnInit } from '@angular/core';

import { MyConstant, MyFavorite } from './myConstant';

@Component({
  selector: 'app-root',
  templateUrl: './app.component.html',
  styleUrls: ['./app.component.scss']
})
export class AppComponent implements OnInit {
  ngOnInit() {
    console.log(MyConstant.COLS); // 10
    console.log(MyConstant.ROWS); // 20
    console.log(MyFavorite.ANIMAL); // モンキー
    console.log(MyFavorite.FOOD); // ドーナッツ
  }
}
メリット・デメリット

案1の逆

参考サイト

stackoverflow.com

qiita.com

GitHubのREADMEにGIFアニメを配置する

f:id:l08084:20180215181945p:plain

はじめに

REDEME.mdにgifアニメがのっているとちゃんとしたプログラムっぽくなる。

手順

色々とやり方があるらしいが(gifを置く用のブランチを作ったり)、下記手順でやってます。

GIPHY Capture. The GIF Maker

GIPHY Capture. The GIF Maker

  • Giphy, Inc.
  • 写真/ビデオ
  • 無料

まず、gifアニメを作成してください。ちなみに私は👆のアプリを使用してgifアニメを作成してます。

f:id:l08084:20180215182557p:plain

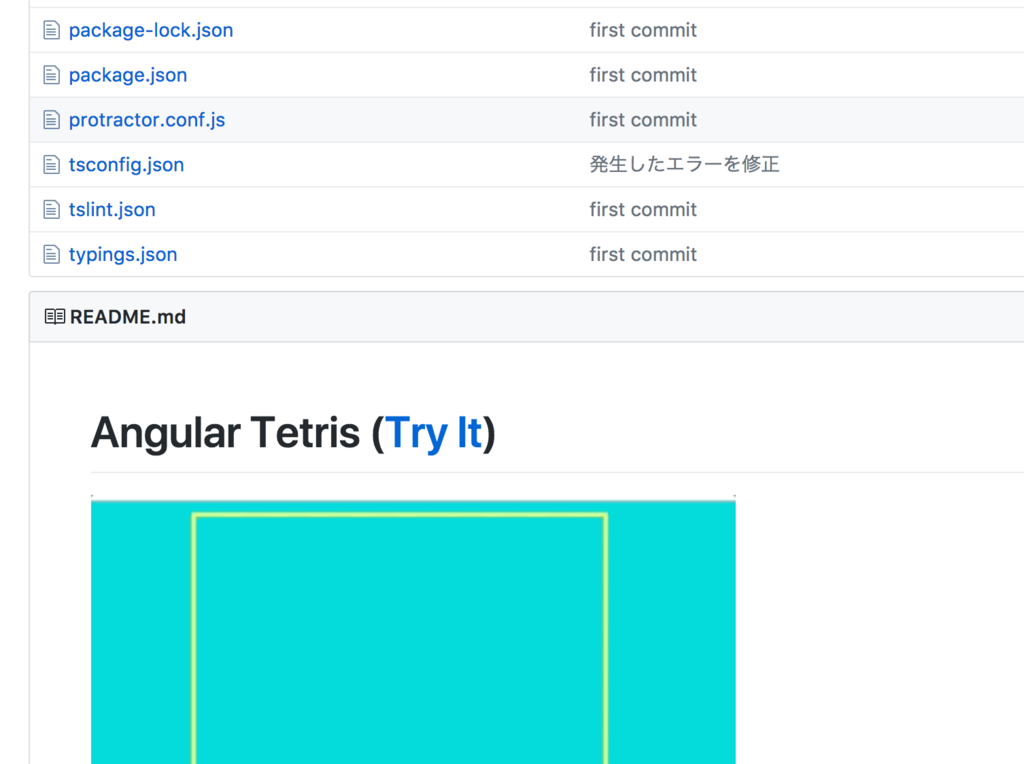
続いて作成したgifファイルをresoucesディレクトリに配置して、 最後に![Angular Tetris](resources/angular-tetris-demo.gif)のようなコードを書いたREADME.mdをGitHubにプッシュすれば完了です。

  • 現在利用しているREADME.mdのテンプレート
Angular Tetris ([Try It](https://l08084.github.io/angular-tetris/))
=========================================================================

![Angular Tetris](resources/angular-tetris-demo.gif)

Run Things Locally
------------------

git clone https://github.com/l08084/angular-tetris
cd angular5-tetris
npm install -g @angular/cli
npm install
ng serve
# open your browser on http://localhost:4200/

出典

下記サイトのREADME.mdを拝借しました。

github.com

Angularでテトリスを作った

f:id:l08084:20180215141549g:plain

はじめに

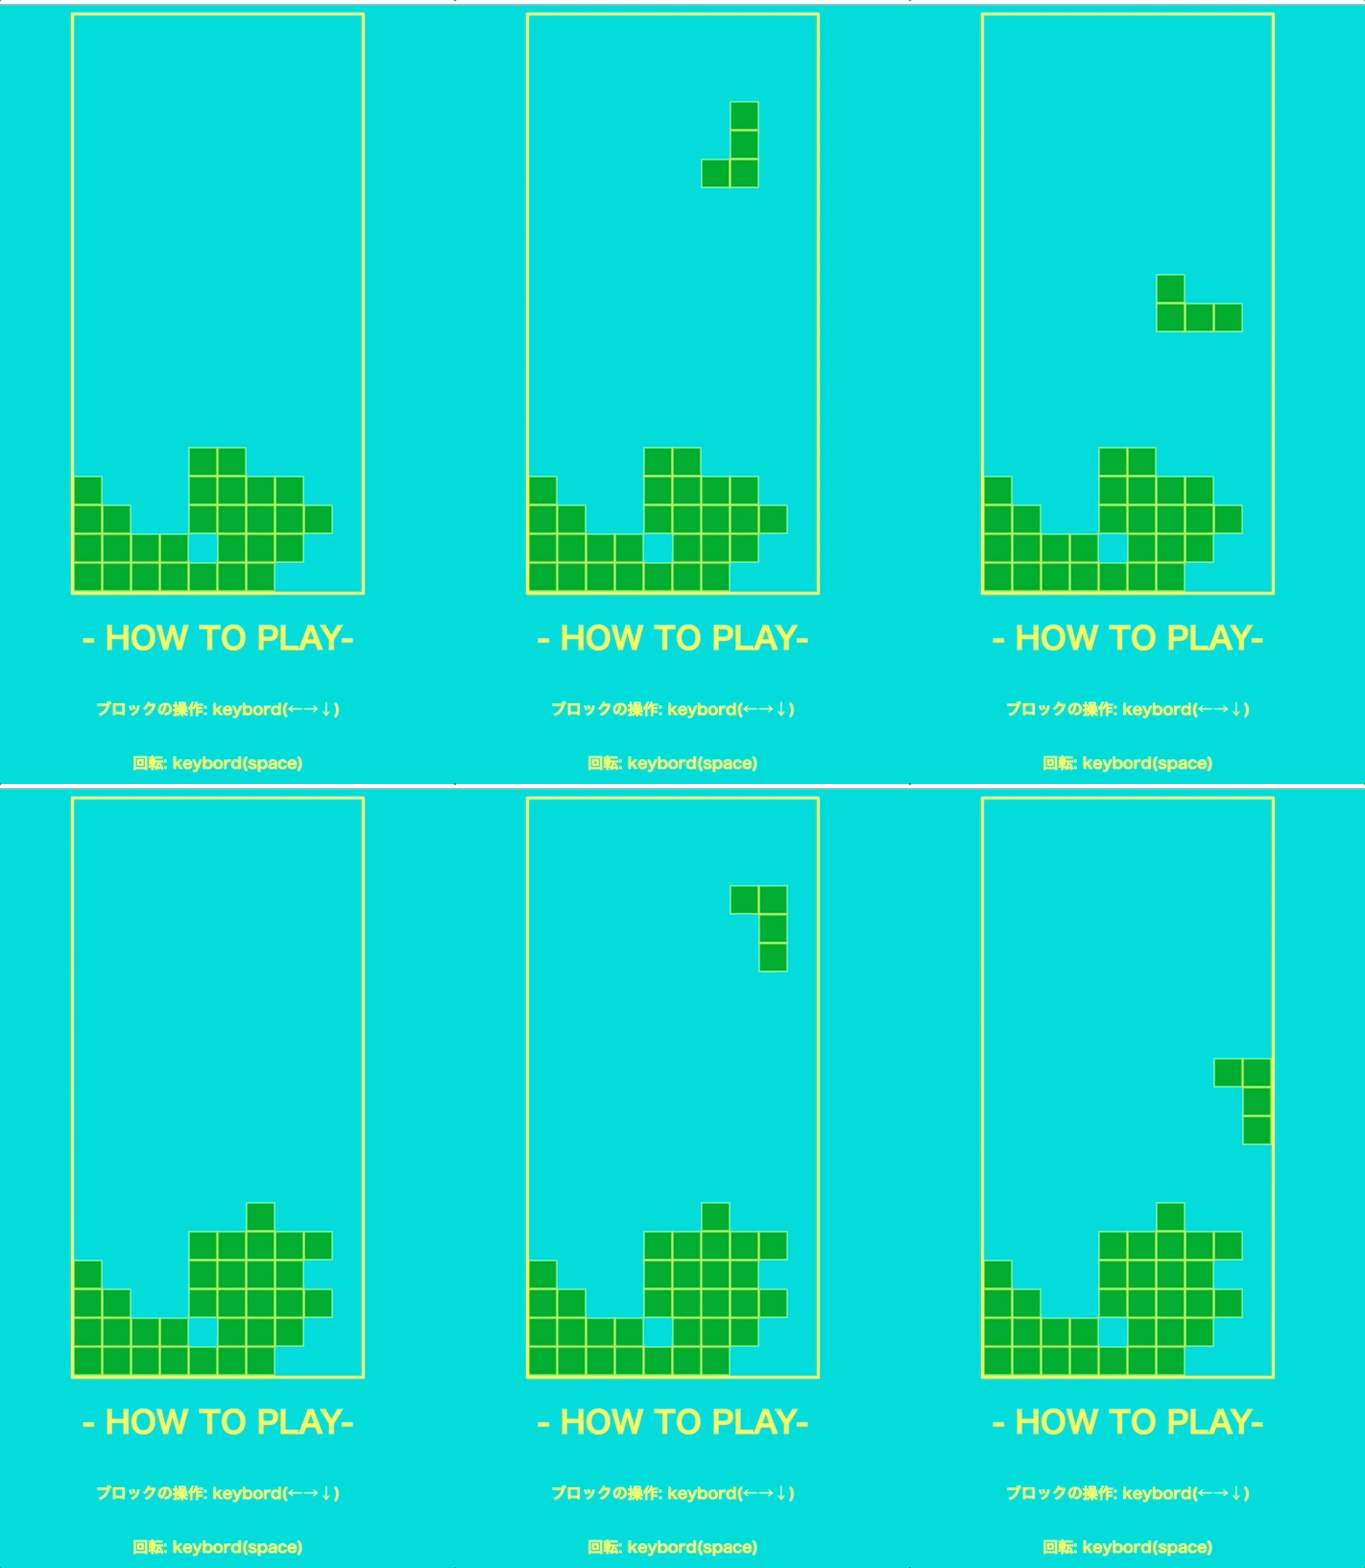
Angular5を使ってテトリスを作成しました。👇のGitHub Pagesで実際に遊べます。

https://l08084.github.io/angular-tetris/

操作方法:

キーボードの矢印キーでブロックの移動、スペースキーでブロックの回転ができます。なお、PC専用でChrome以外の動作確認を行なっていません

ソースコードは👇です

github.com

開発環境

  • Angular: 5.2.3

  • TypeScript: 2.5.3

  • angular/cli: 1.6.5

  • OS: darwin x64

  • Node: 8.1.4

このテトリスについて

下記サイト様のJavaScript版テトリスを参考に作成しました

coderecipe.jp

Angular感のあるところ

基本的に👆サイト様のコードと同じになってしまってるんですが、HTML5要素のcanvasを使用している部分と、キーボードイベントを取得している所をAngular風に書き直しています。

Angularによるcanvas参照

ViewChildアノテーションでcanvasタグのIDを指定すると、canvas要素を参照することができます。

@Component({
  selector: 'app-root',
  template: `<canvas #campas width='300' height='600'></canvas>
             <div class="how-control">
                <h1 class="title">- HOW TO PLAY-</h1>
                <p class="detail">ブロックの操作: keybord(←→↓)</p>
                <p class="detail">回転: keybord(space)</p>
             </div>`,
  styleUrls: ['./app.component.scss']
})
export class AppComponent implements OnInit, AfterViewInit, OnDestroy {
  private context: CanvasRenderingContext2D;

  @ViewChild('campas') campas;

  ngAfterViewInit() {
    const canvas = this.campas.nativeElement;
    this.context = canvas.getContext('2d');
    // 30ミリ秒ごとに状態を描画する関数を呼び出す
    setInterval(() => this.render(), 30);
  }

Angularによるキーボードイベント取得

form以外からのイベント取得ってどうやるのかわかんねえなと思ったんですが、Observableを使うのが今時っぽい。

import { Component, ViewChild, AfterViewInit, OnInit, OnDestroy } from '@angular/core';
import { Observable } from 'rxjs/Observable';
import { Subscription } from 'rxjs/Subscription';
import 'rxjs/add/observable/fromEvent';

@Component({
  selector: 'app-root',
  template: `<canvas #campas width='300' height='600'></canvas>
             <div class="how-control">
                <h1 class="title">- HOW TO PLAY-</h1>
                <p class="detail">ブロックの操作: keybord(←→↓)</p>
                <p class="detail">回転: keybord(space)</p>
             </div>`,
  styleUrls: ['./app.component.scss']
})
export class AppComponent implements OnInit, AfterViewInit, OnDestroy {
  private subscription: Subscription;

  ngOnInit() {
    this.newGame();
    this.subscription = Observable.fromEvent(document, 'keydown').subscribe((e: KeyboardEvent) => {
      this.keyPress(e);
    });
  }

  ngOnDestroy() {
    this.subscription.unsubscribe();
  }

初めてのGithub Pages

angular-cli-ghpagesというライブラリを使ってGithub Pagesにあげることができます。

# インストールしていなければ
$ npm i -g angular-cli-ghpages

# "https://USERNAME.github.io/REPOSITORY/"
$ ng build --prod --base-href "https://l08084.github.io/angular-tetris/"
$ angular-cli-ghpages

参考サイト

qiita.com

qiita.com

Angular + Reduxでテトリスを作ってみた...に続く予定です

TypeScriptエラー「error TS2345: Argument of type '{}' is not assignable to parameter of type 'KeyboardEvent'. Property 'altKey' is missing in type '{}'.」

f:id:l08084:20180214132914p:plain

はじめに

Angularでキーボードの→↓←↑とかspaceキーを押した時のイベントを検知するコードを書いていたら発生したエラーとなります。

  • 発生したエラー
ERROR in src/app/app.component.ts(71,21): error TS2345: Argument of type '{}' is not assignable to parameter of type 'KeyboardEvent'.
  Property 'altKey' is missing in type '{}'.
  • 発生したエラー(日本語)
severity: 'エラー'
message: '型 '{}' の引数を型 'KeyboardEvent' のパラメーターに割り当てることはできません。
  型 '{}' にプロパティ 'altKey' がありません。'

開発環境

  • Angular@5.2.0

  • TypeScript@2.5.3

エラーが発生した時のコード

ngOnInit() {
    this.newGame();
    this.subscription = Observable.fromEvent(document, 'keydown').subscribe(e => {
      this.keyPress(e); // <- ここでエラーが発生
    });
  }

  keyPress(event: KeyboardEvent) {
    console.log(event.code);
  }

エラーを修正した後のコード

eventオブジェクトの型定義をしてあげたら直ります

  ngOnInit() {
    this.newGame();
    // 「e」 を「(e: KeyboardEvent) =>」に修正
    this.subscription = Observable.fromEvent(document, 'keydown').subscribe((e: KeyboardEvent) => {
      this.keyPress(e);
    });
  }

  keyPress(event: KeyboardEvent) {
    console.log(event.code);
  }

  ngOnDestroy() {
    this.subscription.unsubscribe();
  }

TypeScriptで「ERROR TypeError: XXX is not a function」が頻発する

f:id:l08084:20180212140718p:plain

はじめに

TypeScriptでコードを書いていた所、呼び出し先の関数を定義しているのに、 「XXX is not a function」が発生する事象に苦しんだため、対応方法について記述する。

ERROR TypeError: this.isMobile is not a function
    at AppComponent.tick (app.component.ts:166)
    at ZoneDelegate.invokeTask (zone.js:421)
    at Object.onInvokeTask (core.js:4724)
    at ZoneDelegate.invokeTask (zone.js:420)
    at Zone.runTask (zone.js:188)
    at ZoneTask.invokeTask (zone.js:496)
    at ZoneTask.invoke (zone.js:485)
    at timer (zone.js:2025)

エラー詳細

エラーが発生した時のコードを一部抜粋する。

  newGame() {
    this.interval = setInterval(this.tick, 250);
  }

  tick() {
    if (this.isMobile(0, 1)) { // <- is not a functionエラーが発生する
      this.currentY += 1;
    } else {
      this.freeze(); // <- is not a functionエラーが発生する
      this.clearLines(); // <- is not a functionエラーが発生する
      this.newShape(); // <- is not a functionエラーが発生する
    }
  }

isMobileメソッドの呼び出し部分で最初、ERROR TypeError: this.isMobile is not a functionエラーが発生したため、isMobileメソッドの呼び出し部分をコメントアウトするなどしたが、それ以降のメソッドを呼び出している部分でも同様にERROR TypeError: XXX is not a functionエラーが発生し続けた。

エラー原因

setInterval()部分の記載が間違っていたのが原因だった。

  • 修正後のソースコード
  newGame() {
    this.interval = setInterval(() => this.tick(), 250); // this.tick を () => this.tick()に修正した
  }

  tick() {
    if (this.isMobile(0, 1)) { 
      this.currentY += 1;
    } else {
      this.freeze();
      this.clearLines();
      this.newShape();
    }
  }

参考にしたサイト

stackoverflow.com

TypeScriptでcanvas要素を扱っていたら発生したエラー: 型に呼び出しシグネチャがない式を呼び出すことはできません

f:id:l08084:20180211170429p:plain

はじめに

Angular + TypeScriptでcanvasの処理を書いていたら、下記のエラーが発生しました(3つとも同様のエラー)。

ERROR in src/app/app.component.ts(159,7): error TS2349: Cannot invoke an expression whose type lacks a call signature. Type 'string | boolean' has no compatible call signatures.
src/app/app.component.ts(178,5): error TS2349: Cannot invoke an expression whose type lacks a call signature. Type 'string | boolean' has no compatible call signatures.
src/app/app.component.ts(183,5): error TS2349: Cannot invoke an expression whose type lacks a call signature. Type 'string | boolean' has no compatible call signatures.

開発環境

  • Angular@5.2.0

  • TypeScript@2.5.3

  • VisualStudioCode@1.20.0

発生したエラーについて

上記エラーは日本語だと下記の通り表示されます。

[ts] 型に呼び出しシグネチャがない式を呼び出すことはできません。型 'string | boolean' には互換性のある呼び出しシグネチャがありません。

エラーが発生した箇所はいずれもHTML5のcanvasから取得したcontextからメソッドを呼び出す箇所で発生しています。

  • エラー発生箇所-1
render() {
    const ctx = this.context;
    if (ctx) {
      ctx.clearRect(0, 0, this.canpasWidth, this.canpasHeight); // <- エラー発生
      ctx.strokeStyle = 'black';
  • エラー発生箇所-2, 3
  drawBlock(x: number, y: number) {
    this.context.fillRect(this.blockWidth * x,
                          this.blockHeight * y,
                          this.blockWidth - 1,
                          this.blockHeight - 1); // <- エラー発生

    this.context.strokeRect(this.blockWidth * x,
                            this.blockHeight * y,
                            this.blockWidth - 1,
                            this.blockHeight - 1); // <- エラー発生
  }

エラー原因

canvasから取得したcontextの型を誤まってCanvas2DContextAttributesにしたのが原因でした。

  • 修正前のコード
export class AppComponent implements AfterViewInit {
context: Canvas2DContextAttributes; // <- エラー原因

  ngAfterViewInit() {
    const canvas = this.block.nativeElement;
    this.context = canvas.getContext('2d');
    setInterval(() => this.render(), 30);
  }
}

contextの型をCanvasRenderingContext2Dに修正したところエラーが全部消えて正しく稼働しました。

  • 修正後のコード
export class AppComponent implements AfterViewInit {
context: CanvasRenderingContext2D; // <- CanvasRenderingContext2Dに修正するとエラーが消える

  ngAfterViewInit() {
    const canvas = this.block.nativeElement;
    this.context = canvas.getContext('2d');
    setInterval(() => this.render(), 30);
  }
}

参考にしたサイト

qiita.com