中安拓也のブログ

プログラミングについて書くブログ

AngularでRxJSの練習 #2 - APIを叩く

前回の記事に引き続きRxJSの簡単なデモを作成していきます。

開発環境

  • Angular: 5.2.3

  • rxjs: 5.5.2

  • Typescript: 2.4.2

  • OS: darwin x64

  • Node: 8.1.4

練習3: GitHub APIを叩く

GitHub APIからユーザーの一覧(30人分)を取得した後、先頭のユーザー3人分だけを出力するということをやります。

AppModuleの設定

APIのアクセスには、AngularのHttpモジュールを使用するため、前準備として、app.module.tsの設定を変更します。importsHttpModuleを追加してください。

src/app/app.module.ts:

import { BrowserModule } from '@angular/platform-browser';
import { NgModule } from '@angular/core';

import { AppComponent } from './app.component';

// rxjsのオペレーターを一括import
import 'rxjs/Rx';
import { HttpModule } from '@angular/http'; // <- add this!

@NgModule({
  declarations: [
    AppComponent
  ],
  imports: [
    BrowserModule,
    HttpModule, // <- add this!
  ],
  providers: [],
  bootstrap: [AppComponent]
})
export class AppModule { }

RxJSでAPI呼び出し

続いて、APIを呼び出すソースコードについて説明します。 flatMapがキモになっていて、Array(30)のObservable 1件をflatMapで30件のObservableに分解して、 先頭の3件のみを取得できるようにしています。

src/app/app.component.ts:

import { Component, OnInit } from '@angular/core';
import { Observable } from 'rxjs/Observable';
import { Http, Request, RequestMethod } from '@angular/http';

@Component({
  selector: 'app-root',
  template: ``,
  styleUrls: ['./app.component.css']
})
export class AppComponent implements OnInit {

  constructor(private http: Http) {}

  ngOnInit() {
    this.http.get(`https://api.github.com/users`)
      .map(res => res.json())
      .flatMap(observable => observable) // 1つのObservableを30件のObservableに分解する
      .take(3) // 先頭の3件だけ取得
      .subscribe(console.log);
  }
}

実行結果

練習3で書いたソースコードを実行すると👇のように表示されます。 f:id:l08084:20180303103726p:plain

参考サイト

ninjinkun.hatenablog.com

AngularでRxJSの練習 #1 - クリック・ダブルクリックカウンターを作る

初めに

Angular + Reduxでアプリを作ることになり、RxJSに初めて触れたものの、オペレーターを使わずになんでもsubscribecombineLatestで解決しようとする習性がなかなか抜けない.........特訓だ!目指せ、RP(リアクティブプログラミング)マスター💪💪💪

開発環境

RxJSの環境を作るのが面倒なので、Angular CLIで環境を作る

  • Angular: 5.2.3

  • rxjs: 5.5.2

  • Typescript: 2.4.2

  • OS: darwin x64

  • Node: 8.1.4

練習

AngularとRxJSを使って簡単なデモを作っていく。

練習1: クリックカウンター

f:id:l08084:20180301175213g:plain

クリックした回数を画面に表示するデモ。

  1. Observable.fromEventでクリックイベントを検知

  2. クリックイベントをmap(_ => 1)で数値の1に変換

  3. scan()で数値の合計を計算

  4. subscribe()してクリック数を画面に表示する~といった流れになっています

src/app/app.component.ts:

import { Component, OnInit } from '@angular/core';
import { Observable } from 'rxjs/Observable';

@Component({
  selector: 'app-root',
  template: `{{ value }}`,
  styleUrls: ['./app.component.css']
})
export class AppComponent implements OnInit {
  value = 0;

  ngOnInit() {
    Observable.fromEvent(document, 'click') // クリックイベントを検知
    .map(_ => 1) // イベントを数値の1に変換
    .scan((acc, value) => acc + value) // 数値の合計を計算
    .subscribe(value => this.value = value);
  }
}

練習2: ダブルクリックカウンター

ダブルクリック(正確にはダブル以上)した時だけカウント数を画面に表示するデモ。

.bufferTime(250)を使用して、イベントを配列に変換し、配列の要素数が2以上の場合のみ、ダブルクリックと判定している。

src/app/app.component.ts:

import { Component, OnInit } from '@angular/core';
import { Observable } from 'rxjs/Observable';

@Component({
  selector: 'app-root',
  template: `{{ value }}`,
  styleUrls: ['./app.component.css']
})
export class AppComponent implements OnInit {
  value = 0;

  ngOnInit() {
    Observable.fromEvent(document, 'click')
      .bufferTime(250) // 250ms以内のイベントを配列にまとめる
      .map(x => x.length) // 配列を配列の長さに変換
      .filter(length => length >= 2)
      .do(_ => console.log('double click'))
      .map(_ => 1)
      .scan((acc, value) => acc + value)
      .subscribe(value => this.value = value);
  }
}

参考サイト

ninjinkun.hatenablog.com

qiita.com

qiita.com

AngularにおけるRxJSのインポートについて整理した

はじめに

ERROR in src/app/app.component.ts(17,6): error TS2339: Property 'map' does not exist on type 'Observable<{}>'.

AngularでRxJSを書いていて、上のエラーみたく"〇〇オペレータがないよ!!"と怒られることが多々あるので、RxJSのインポート方法について整理しました。

バージョン情報

  • Angular: 5.2.7

  • Visual Studio Code: 1.20.1

  • OS: win32 x64

  • Node: 8.9.3

  • typescript: 2.4.2

案1: 使用するオペレーターだけ個別にimport

下記のクリック回数をカウントするコードでは、fromEventmapscanを使っているので、それぞれimport 'rxjs/add/observable/fromEvent';import 'rxjs/add/operator/map';import 'rxjs/add/operator/scan';で個別にインポートしています。

src/app/app.component.ts:

import { Component, OnInit } from '@angular/core';
import { Observable } from 'rxjs/Observable';
// RxJSのオペレーターを個別import
import 'rxjs/add/observable/fromEvent';
import 'rxjs/add/operator/map';
import 'rxjs/add/operator/scan';

@Component({
  selector: 'app-root',
  template: `{{ value }}`,
  styleUrls: ['./app.component.css']
})
export class AppComponent implements OnInit {
  value = 0;

  ngOnInit() {
    Observable.fromEvent(document, 'click')
    .map(_ => 1)
    .scan((acc, value) => acc + value)
    .subscribe(value => this.value = value);
  }
}

案2: 一括import

app.module.tsに以下の文を追加すると、使用するオペレーターごとにimportする必要がなくなります。

import 'rxjs/Rx';

最後に

f:id:l08084:20180301162425p:plain 一括importを採用すると、容量の増加につながる上に、tslintに怒られたりもするので、状況によって使い分けていきたい。

参考サイト

christianliebel.com

qiita.com

Angular CLIで遭遇したエラー: Error: Cannot find module '@angular-devkit/core'

f:id:l08084:20180301143247p:plain

エラーに遭遇した状況

Angular CLIを使って、Angularプロジェクトを作成した後ng serveを実行してアプリを起動しようとしたら発生した。

$ ng new new-app
$ cd new-app
$ ng serve

# エラー発生!!
module.js:538
    throw err;
    ^

Error: Cannot find module '@angular-devkit/core'
    at Function.Module._resolveFilename (module.js:536:15)
    at Function.Module._load (module.js:466:25)
    at Module.require (module.js:579:17)
    at require (internal/module.js:11:18)
    at Object.<anonymous> 
    at Module._compile (module.js:635:30)
    at Object.Module._extensions..js (module.js:646:10)
    at Module.load (module.js:554:32)
    at tryModuleLoad (module.js:497:12)
    at Function.Module._load (module.js:489:3)

開発環境

  • OS: Windows 10

  • node: 8.9.3

  • angular-cli: 1.6.2

対策: @angular-devkit/coreインストール

このエラーに遭遇するたびにいつもやっているやつ。 @angular-devkit/coreモジュールがないと言っているみたいだったので、installしてあげたらエラーが出なくなりました。

npm install --save @angular-devkit/core

ネットで調べると他にもいろいろと対策があるらしいです。。。以上!

Angular + Reduxでストップウォッチを作る

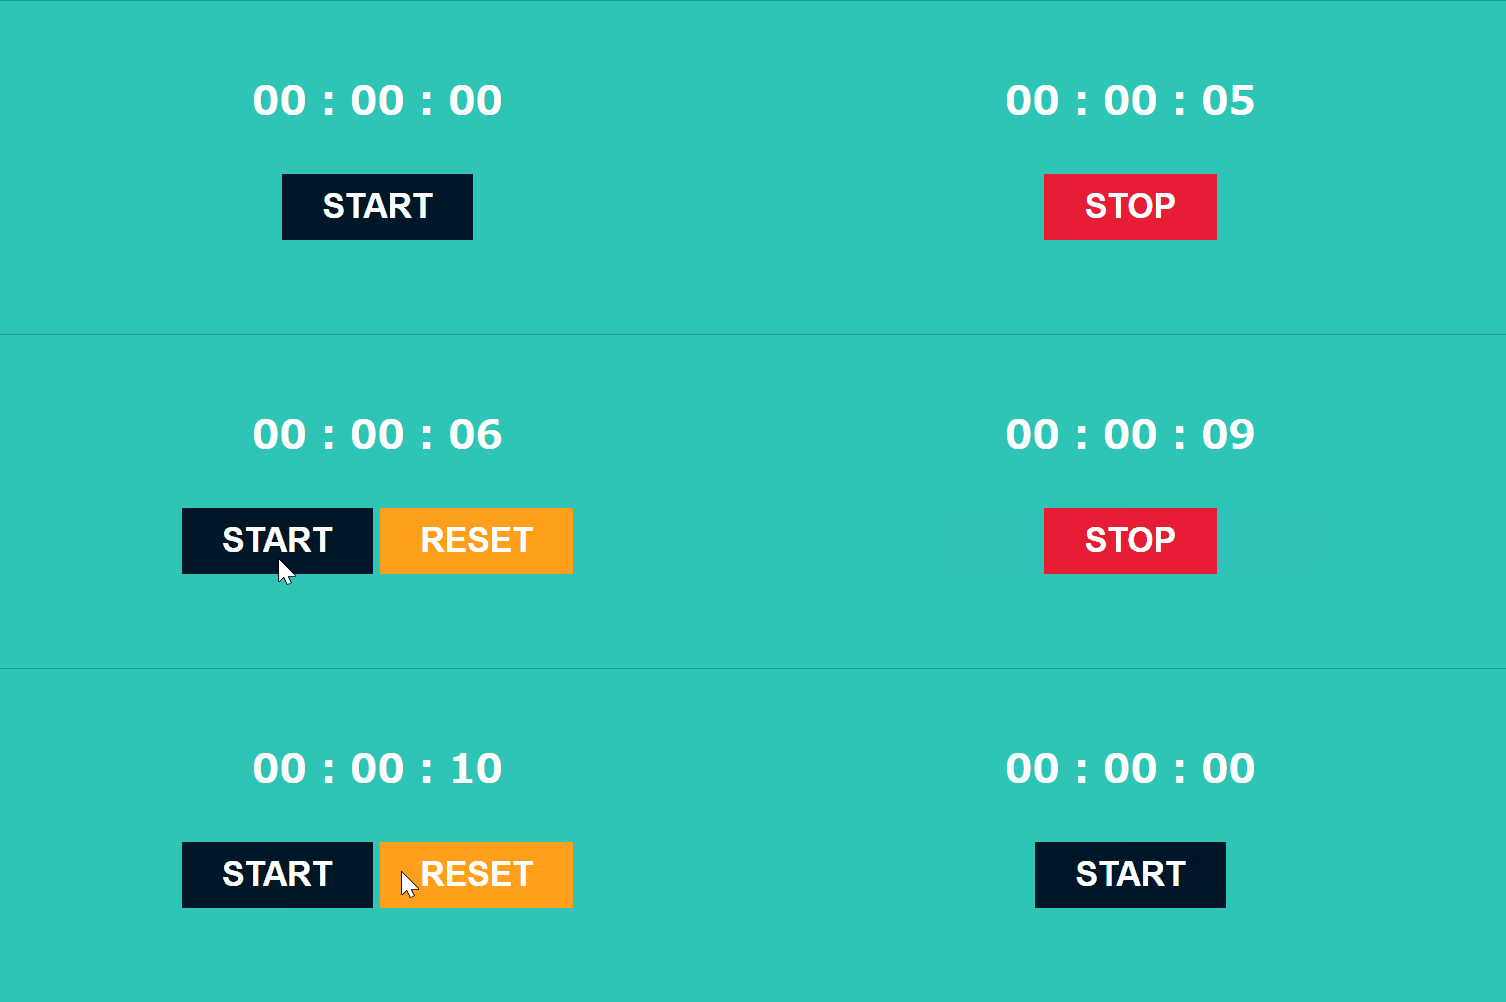
f:id:l08084:20180228152503g:plain

はじめに

Angular + Reduxでストップウオッチを作りました

  • デモ

https://l08084.github.io/ng-stopwatch/

  • ソースコード

github.com

実装

開発環境

  • Angular: 5.2.3

  • angular-redux/store: 7.1.0

  • OS: darwin x64

  • Node: 8.1.4

概要

angular-redux/storeを使ったReduxのアーキテクチャを採用しました。 ストップウオッチについては、Observable.interval(1000)を使用して、STARTボタンを押下してから、何秒経過したかを計測した後、計測結果をmoment.jsとAngularのPipeで、HH : mm : ssフォーマットに変更するといった流れになっています。

f:id:l08084:20180228170559p:plain

Store

Storeでは、何秒経過したかを記録するtimeと、STOPボタンが押されているかどうかを記録するisStopの2つのプロパティを定義しています。

src/state/store.ts:

import { Action } from 'redux';
import { TimerActions } from '../state/action';

export interface IAppState {
    time: number;
    isStop: boolean;
}

export const INITIAL_STATE: IAppState = {
    time: 0,
    isStop: false,
};

Action

Actionでは、3つあるボタン(START, STOP, RESET)に対応した3メソッドを定義しています。

src/state/action.ts:

import { Injectable } from '@angular/core';
import { Action, Store } from 'redux';
import { FluxStandardAction } from 'flux-standard-action';
import { dispatch, NgRedux } from '@angular-redux/store';
import { IAppState } from './store';

export type VoidAction = FluxStandardAction<void, void>;

@Injectable()
export class TimerActions {
  static readonly COUNT = 'COUNT';
  static readonly STOP = 'STOP';
  static readonly RESET = 'RESET';

  @dispatch() count = (): VoidAction => ({
    type: TimerActions.COUNT,
    payload: undefined,
    meta: undefined
  })

  @dispatch() stop = (): VoidAction => ({
    type: TimerActions.STOP,
    payload: undefined,
    meta: undefined
  })

  @dispatch() reset = (): VoidAction => ({
    type: TimerActions.RESET,
    payload: undefined,
    meta: undefined
  })
}

Reducer

count()が呼び出されるたびに、Storeのtimeプロパティを+1ずつインクリメントしています。

src/state/reducer.ts:

import { IAppState } from './store';
import { Action } from 'redux';
import { TimerActions,
         VoidAction,
        } from './action';

export function rootReducer(
    lastState: IAppState,
    action: Action
): IAppState {
    switch (action.type) {
        case TimerActions.COUNT:
            return {
              time: lastState.time += 1,
              isStop: false,
            };
        case TimerActions.STOP:
            return {
              time: lastState.time,
              isStop: true,
            };
        case TimerActions.RESET:
            return {
              time: 0,
              isStop: false,
            };
            default:
                return lastState;
    }
}

Appcomponent

本アプリケーションのキモであるAppComponentです。 isStoptrueになっている状態(STOPボタンが押された)では、this.action.count()を呼び出さないようにしています。

src/app/app.component.ts:

import { Component, OnInit } from '@angular/core';
import { select } from '@angular-redux/store';
import { Observable } from 'rxjs/Observable';
import { TimerActions } from '../state/action';

import 'rxjs/add/observable/interval';
import { Subscription } from 'rxjs/Subscription';


@Component({
  selector: 'app-root',
  templateUrl: './app.component.html',
  styleUrls: ['./app.component.scss']
})
export class AppComponent implements OnInit {
  @select() readonly time$: Observable<number>;
  @select() readonly isStop$: Observable<boolean>;

  subscription: Subscription;
  isStop: boolean;

  constructor(
    private action: TimerActions
  ) {}

  ngOnInit() {
    this.isStop$.subscribe(isStop => this.isStop = isStop);
  }

  countStart = (): void => {
    if (this.subscription) {
      this.subscription.unsubscribe();
    }
    this.isStop = false;
    this.subscription = Observable.interval(1000)
      .subscribe(() => {
        if (this.isStop) {
          return;
        }
        this.action.count();
      });
  }

  callReset = (): void => {
    if (this.subscription) {
      this.subscription.unsubscribe();
    }
    this.action.reset();
  }
}

概要で説明した通り、Observable.interval()でカウントした結果をPipeで変換することによって、デジタル形式で時刻を表示しています(例えば、カウント結果が70だとするとデジタル形式では、00: 01 : 10になる)。

src/app/app.component.html:

<div class="timer-box">
  <h1 class="timer">{{ (time$ | async) | digitalTimer }}</h1>
  <div>
    <button *ngIf="((isStop$ | async) || (time$ | async) === 0) else elseBlock"
    (click)="countStart()" class="start">START</button>
    <ng-template #elseBlock>
        <button (click)="action.stop()" class="stop">STOP</button>
    </ng-template>
    <button *ngIf="(isStop$ | async)"
      (click)="callReset()" class="reset">RESET</button>
  </div>
</div>

Pipe

JavaScriptのDateを素のままで使うと少々厳しいので、moment.jsライブラリーを使用しています。

# moment.jsをインストール
$ npm install --save moment

import * as moment from 'moment';の行でmoment.jsをインポートした後、 moment().hour(0).minute(0).second(time).format('HH : mm : ss')の行でフォーマット変換を行なっています。

src/app/digital-timer-pipe.ts:

import { Pipe, PipeTransform } from '@angular/core';
import * as moment from 'moment';

@Pipe({
  name: 'digitalTimer'
})
export class DigitalTimerPipe implements PipeTransform {

  transform(time: number): string {
    return moment().hour(0).minute(0).second(time).format('HH : mm : ss');
  }

}

参考サイト

jsfiddle.net

Angular + Reduxでテトリスを作る

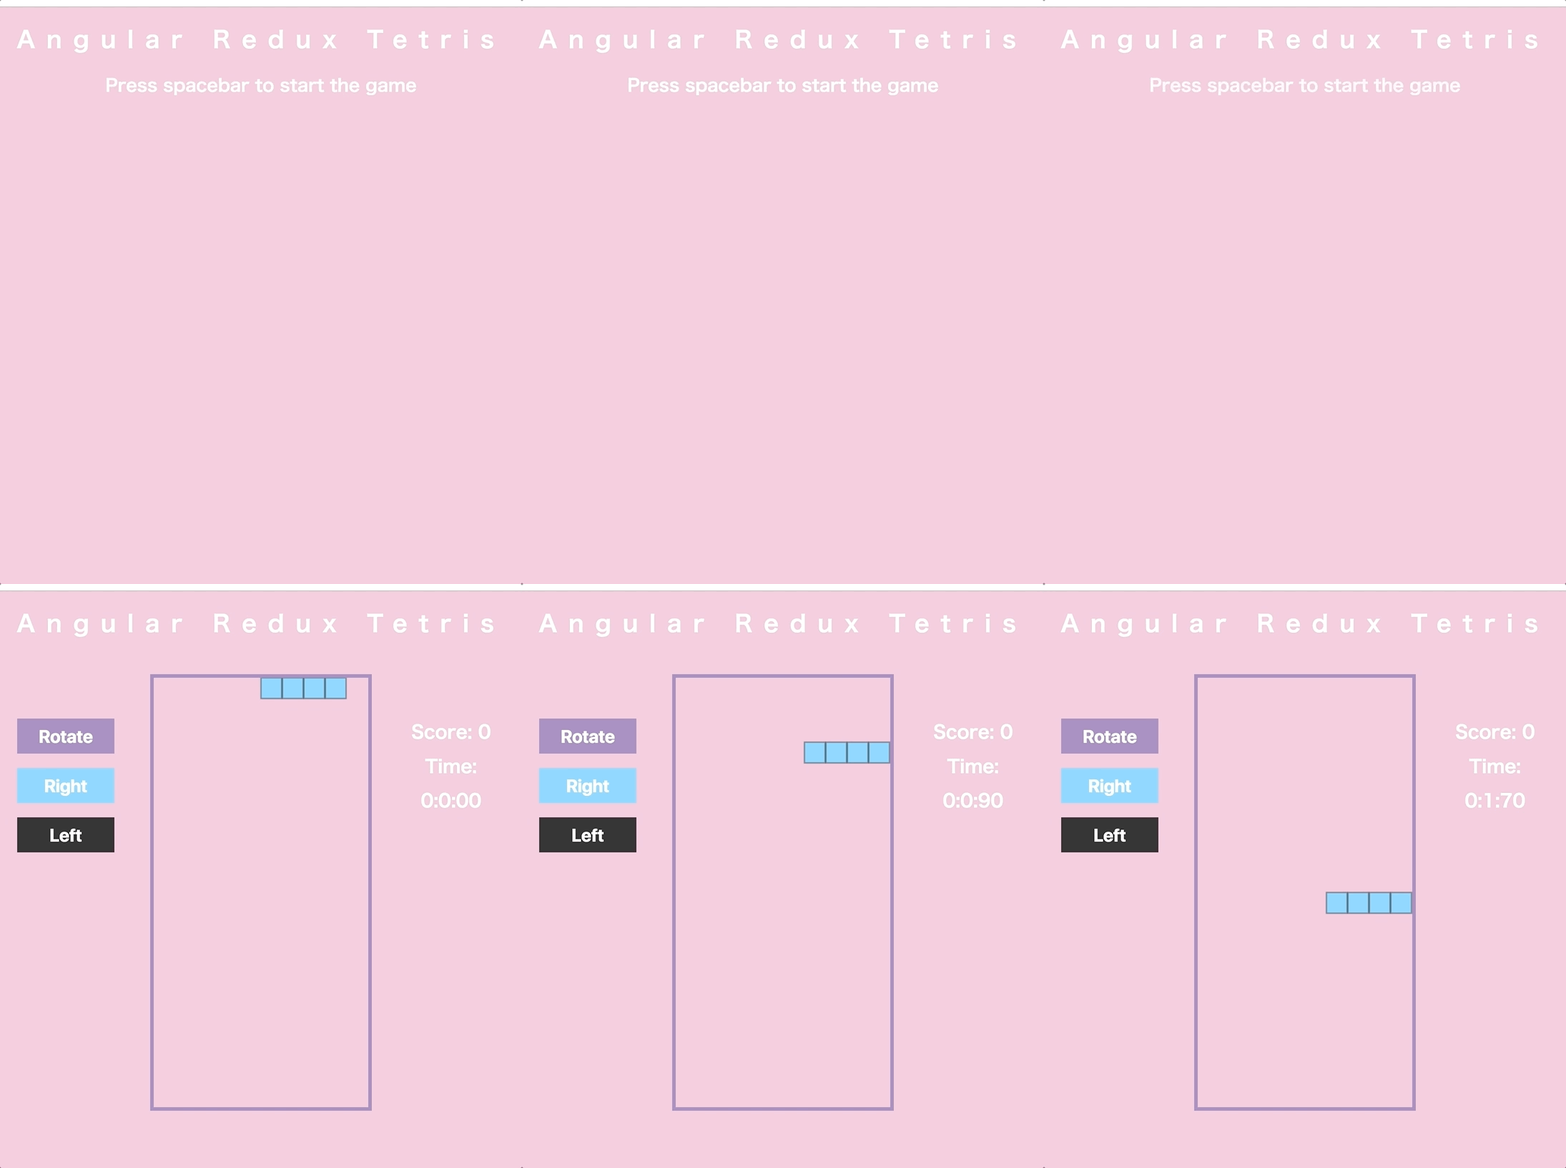
f:id:l08084:20180224195842g:plain

はじめに

以前、Angular5で作成したテトリスをAngular + Reduxで作り直してみました。

https://l08084.github.io/ng-redux-tetris/

実際に👆のURLから遊ぶことができて(PCのChromeでのみ動作確認済み)、

github.com

GitHubにソースコードも置いています。

関連記事

l08084.hatenablog.com

Angular + Reduxの環境構築手順については👆の記事を参照してください。

l08084.hatenablog.com

Angular5でテトリスを作った時の記事は👆

遊び方

SPACEキーでゲームが開始します。

  • : ブロックを右へ移動

  • : ブロックを左へ移動

  • : ブロックを下へ移動

  • : ブロックを回転

ブロックの左右移動・回転については、画面に配置してあるボタンでも操作可能です。

実装

開発環境

  • Angular: 5.2.3

  • angular-redux/store: 7.1.0

  • rxjs: 5.5.6

  • TypeScript: 2.5.3

  • angular/cli: 1.6.5

  • OS: darwin x64

  • Node: 8.1.4

構成

f:id:l08084:20180226154728p:plain AppComponentがユーザーによるキー入力イベント・タイマーからの呼び出しに応じて以下3つのサービスクラスを呼び出します。

  • TetrisService: ブロックの座標変更・揃った時のブロック消去・ゲームオーバー判定

  • ControllerService: キー入力によるブロック移動

  • RenderService: HTML5のcanvas要素におけるブロックのレンダリング処理

各種サービスでState(状態)の変更が必要になった時はActionクラスが呼び出されます。ActionクラスはActionをディスパッチしてReducerクラスに引き渡し、Stateの変更を行います。Stateの変更後の値については、@selectデコレーターによってAppComponentと各種サービスで取得することができます。

AppComponent・各種サービスクラス

src/app/app.component.htmlの一部抜粋:

<div class="title">
    <h1 class="big">Angular Redux Tetris</h1>
    <h2 *ngIf="!(isGameStart$ | async); else tetrisBlock" class="flash">Press spacebar to start the game</h2>
</div>
<ng-template #tetrisBlock>
    <canvas #campas width='300' height='600'></canvas>
    <div class="info">
        <div class="info-child">Score: {{ score$ | async }}</div>
        <div class="info-child">Time:</div>
        <div class="info-child">{{ digitalTimer$ | async }}</div>
    </div>
</ng-template>

AppComponentのテンプレートであるapp.component.htmlでは、AngularのngIfディレクティブを使うことによって「テトリススタート画面」と「テトリスプレイ画面」の両方を表示しています。スコアscore$とプレイ時間digitalTimer$については、Observable型であるため、asyncパイプを使用して表示しています。

src/app/app.component.scssの一部抜粋:

.title {
    .flash {
        animation: Flash 1s infinite;
    }
}

@keyframes Flash {
    50% {
        opacity: 0;
    }
}

「テトリススタート画面」におけるメッセージ「Press spacebar to start the game」点滅はCSSアニメーションを使って実現しています。

// ブロックを盤面の上の方にセットする
this.tetrisAction.setCurrentX(5);
this.tetrisAction.setCurrentY(0);

AppComponentや各種サービスクラスでStateを変更する必要がある場合は、↑の通り、Actionクラスのメソッドを呼び出す必要があります。

Action

state/action.tsの一部抜粋:

export type VoidAction = FluxStandardAction<void, void>;
export type StringAction = FluxStandardAction<string, void>;
export type InsertShapeToCurrentAction = FluxStandardAction<InsertShapeToCurrentParam, void>;

@Injectable()
export class TetrisActions {
  static readonly INSERT_SHAPE_TO_CURRENT = 'INSERT_SHAPE_TO_CURRENT';
  static readonly SET_CURRENT_X = 'SET_CURRENT_X';

  @dispatch() insertShapeToCurrent
    = (insertShapeToCurrentParam: InsertShapeToCurrentParam): InsertShapeToCurrentAction => ({
    type: TetrisActions.INSERT_SHAPE_TO_CURRENT,
    payload: insertShapeToCurrentParam,
    meta: undefined
  })

  @dispatch() setCurrentX = (positionX: number): NumberAction => ({
    type: TetrisActions.SET_CURRENT_X,
    payload: positionX,
    meta: undefined
  })

AppComponentおよびサービスクラスから呼び出されたメソッドに応じて、ReducerにActionを(@dispatchデコレーターで)ディスパッチする。

Reducer

state/reducer.tsの一部抜粋:

export function rootReducer(
    lastState: IAppState,
    action: Action
): IAppState {
    switch (action.type) {
        case TetrisActions.INSERT_SHAPE_TO_CURRENT:
            const x = (action as InsertShapeToCurrentAction).payload.x;
            const y = (action as InsertShapeToCurrentAction).payload.y;
            const id = (action as InsertShapeToCurrentAction).payload.id;
            // 配列の値渡し
            const newCurrent = lastState.current.concat();
            newCurrent[y][x] = id;
            return {
                board: lastState.board,
                isLose: lastState.isLose,
                current: newCurrent,
                currentX: lastState.currentX,
                currentY: lastState.currentY,
                rotated: lastState.rotated,
                score: lastState.score,
                digitalTimer: lastState.digitalTimer,
                isGameStart: lastState.isGameStart,
            };
        case TetrisActions.SET_CURRENT_X:
            return {
                board: lastState.board,
                isLose: lastState.isLose,
                current: lastState.current,
                currentX: (action as NumberAction).payload,
                currentY: lastState.currentY,
                rotated: lastState.rotated,
                score: lastState.score,
                digitalTimer: lastState.digitalTimer,
                isGameStart: lastState.isGameStart,
            };
            default:
                return lastState;
    }
}

state/store.ts:

import { Action } from 'redux';
import { TetrisActions } from '../state/actions';

export interface IAppState {
    board: number[][]; // 盤面情報
    isLose: boolean; // 一番上までいっちゃったかどうか
    current: number[][]; // 今操作しているブロックの形
    currentX: number; // ブロックの現在の座標
    currentY: number; // ブロックの現在の座標
    rotated: number[][];
    score: number;
    digitalTimer: string;
    isGameStart: boolean;
}

export const INITIAL_STATE: IAppState = {
    board: null, // 盤面情報
    isLose: false, // 一番上までいっちゃったかどうか
    current: null, // 今操作しているブロックの形
    currentX: null, // ブロックの現在の座標
    currentY: null, // ブロックの現在の座標
    rotated: null,
    score: 0,
    digitalTimer: '0:0:00',
    isGameStart: false,
};

Reducerでは、Actionから受け取った情報に応じてStateの次の状態を作成し、作成したStateを返却することによって画面の状態を最新化します。

store.tsでは、IAppStateでStateのプロパティを、INITIAL_STATEでStateの初期状態を定義しています。

参考サイト

qiita.com

coderecipe.jp

github.com

RxJS: Observable.intervalの止め方

はじめに

一定間隔で繰り返したい時におなじみのsetIntervalをRxJSでかくとObservable.intervalになりますが、 setIntervalに対するclearIntervalのようにObservable.intervalを止めたい時は何を使えばいいんだろうか🤔

開発環境

  • Angular: 5.2.3

  • rxjs: 5.5.6

  • TypeScript: 2.5.3

  • angular/cli: 1.6.5

  • OS: darwin x64

  • Node: 8.1.4

他と同様にunsubscribeで停止できる

他のRxJSのsubscribeと同様に、Observable.intervalについてもunsubscribeで停止できます。

サンプルコード

src/app/app.component.ts:

import { Component, OnInit } from '@angular/core';
import { Subscription } from 'rxjs/Subscription';
import { Observable } from 'rxjs/Observable';
import 'rxjs/add/observable/interval';
import 'rxjs/add/observable/fromEvent';

@Component({
  selector: 'app-root',
  templateUrl: './app.component.html',
  styleUrls: ['./app.component.css']
})
export class AppComponent implements OnInit {
  private timer: Subscription;

  ngOnInit() {
    // 1秒間隔で「interval: {現在時刻}」と出力し続ける
    this.timer = Observable.interval(1000)
              .subscribe(() => console.log(`interval: ${new Date()}`));
    
    // クリックイベントを検知すると、
    // 「interval stop!」と出力した後に
    // Observable.intervalが停止する
    Observable.fromEvent(document, 'click').subscribe(() => {
      console.log('interval stop!')
      this.timer.unsubscribe();
    });
  }
}

サンプルコードの動作結果はこうなります。

f:id:l08084:20180220165524p:plain

RxJS4系だとDisposable.prototype.disposeを使うらしいです(4系使ったことないので知りませんが.....)。