はじめに
window.open()で開いたウィンドウに親ウィンドウからデータを渡す処理を仕事で書いた時に色々と苦労したので、備忘録としてプライベートでも似たような実装をしてみました。
環境
SPAフレームワークのAngular/TypeScriptを使用しています。
- Angular: 8.2.14
- Node: 12.13.1
- TypeScript: 3.5.3
今回やりたいこと
1.あるウィンドウからwindow.open()で別のウィンドウを開く

2.親ウィンドウから子ウィンドウにデータを渡す

今回の記事では、2. の親ウィンドウから子ウィンドウへの値の渡し方についてフォーカスを当てて説明します。1. のwindow.open()で別ウィンドウを開く実装については、こちらの記事をご参照ください。
ウィンドウにデータを渡す二つの方法
ウィンドウにデータを渡す方法についてですが、本記事では下記の二つの方法について説明します。
1. ローカルストレージを用いる方法
ブラウザにデータを保存する技術の一つであるローカルストレージ(localStorage)を使用してウィンドウ間でデータの受け渡しをします。
2. window.postMessage()を用いる方法
Windowオブジェクト間で通信する技術の一つであるwindow.postMessage()を使用して、親ウィンドウから子ウィンドウにデータを送信します。

ウィンドウにデータを渡す実装
ローカルストレージを採用した場合とwindow.postMessage()を採用した場合の二つに分けてwindow.open()で開いたウィンドウにデータを渡す処理の実装について説明していきます。
今回は下記のオブジェクトを親ウィンドウから子ウィンドウに渡します。
export class Message {
  id: number;
  description: string;
}
ローカルストレージを採用した場合
localStorageを使用して、親ウィンドウから子ウィンドウにデータ(オブジェクト)を渡す処理を実装します。
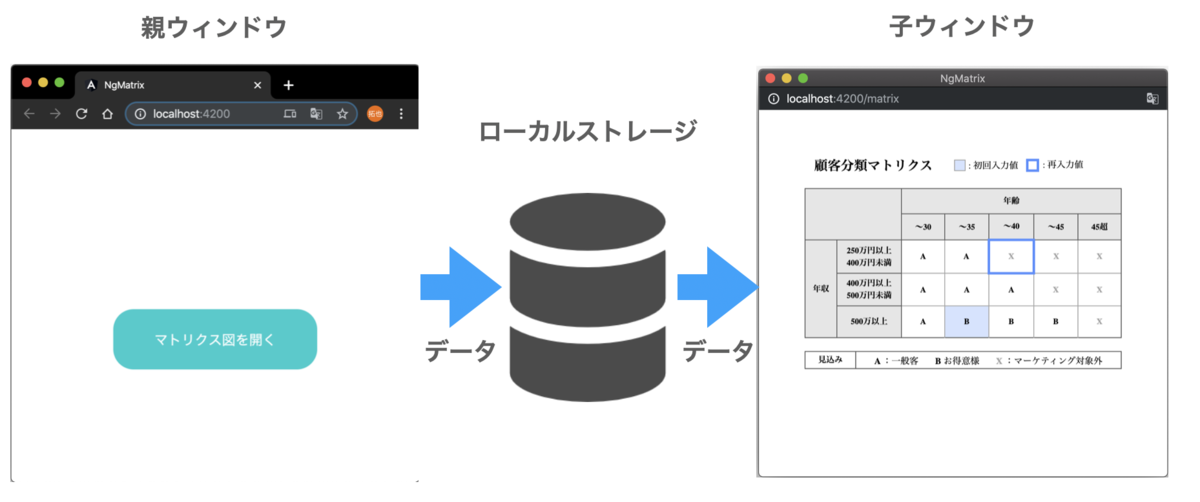
親ウィンドウの実装
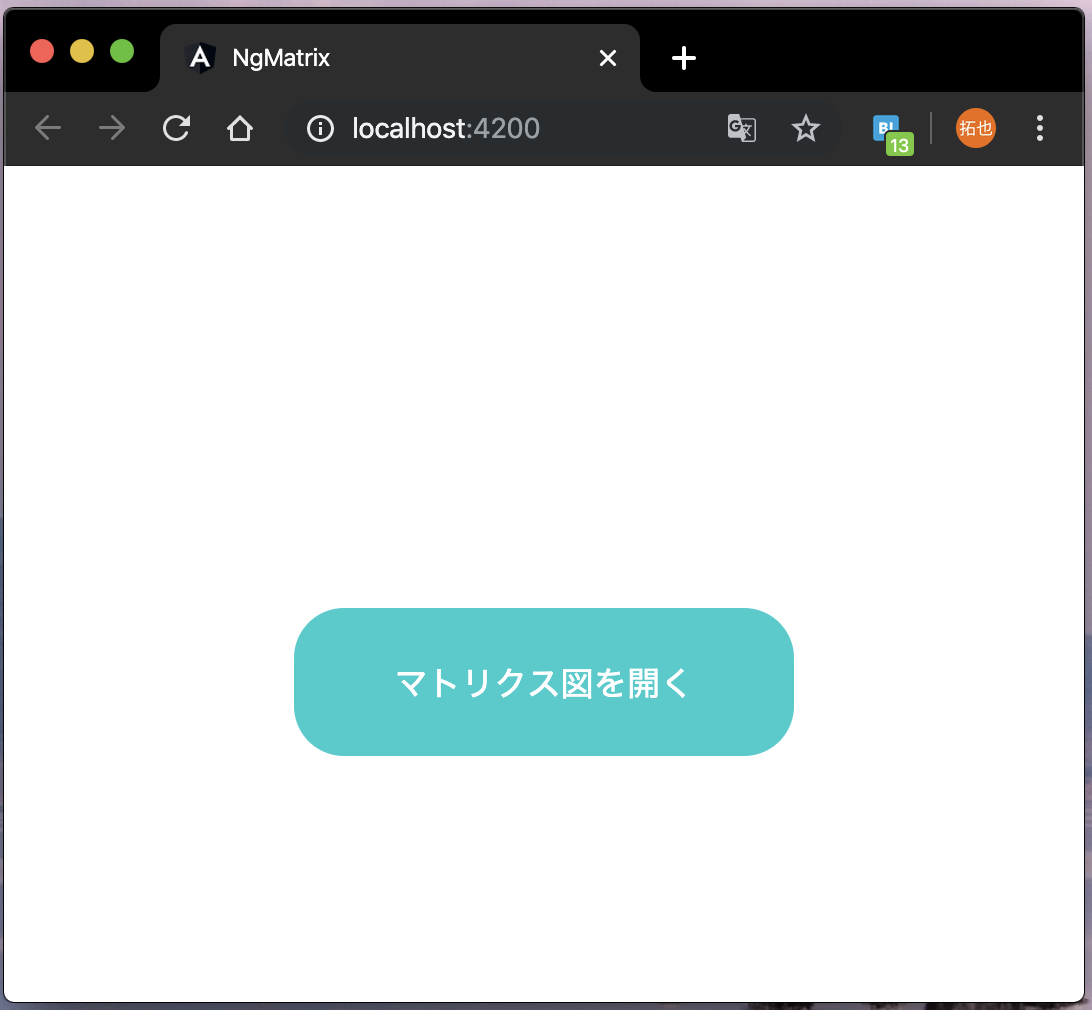
親ウィンドウでは、MessageオブジェクトをlocalStorageに格納した後、window.open()で子ウィンドウを開いています。
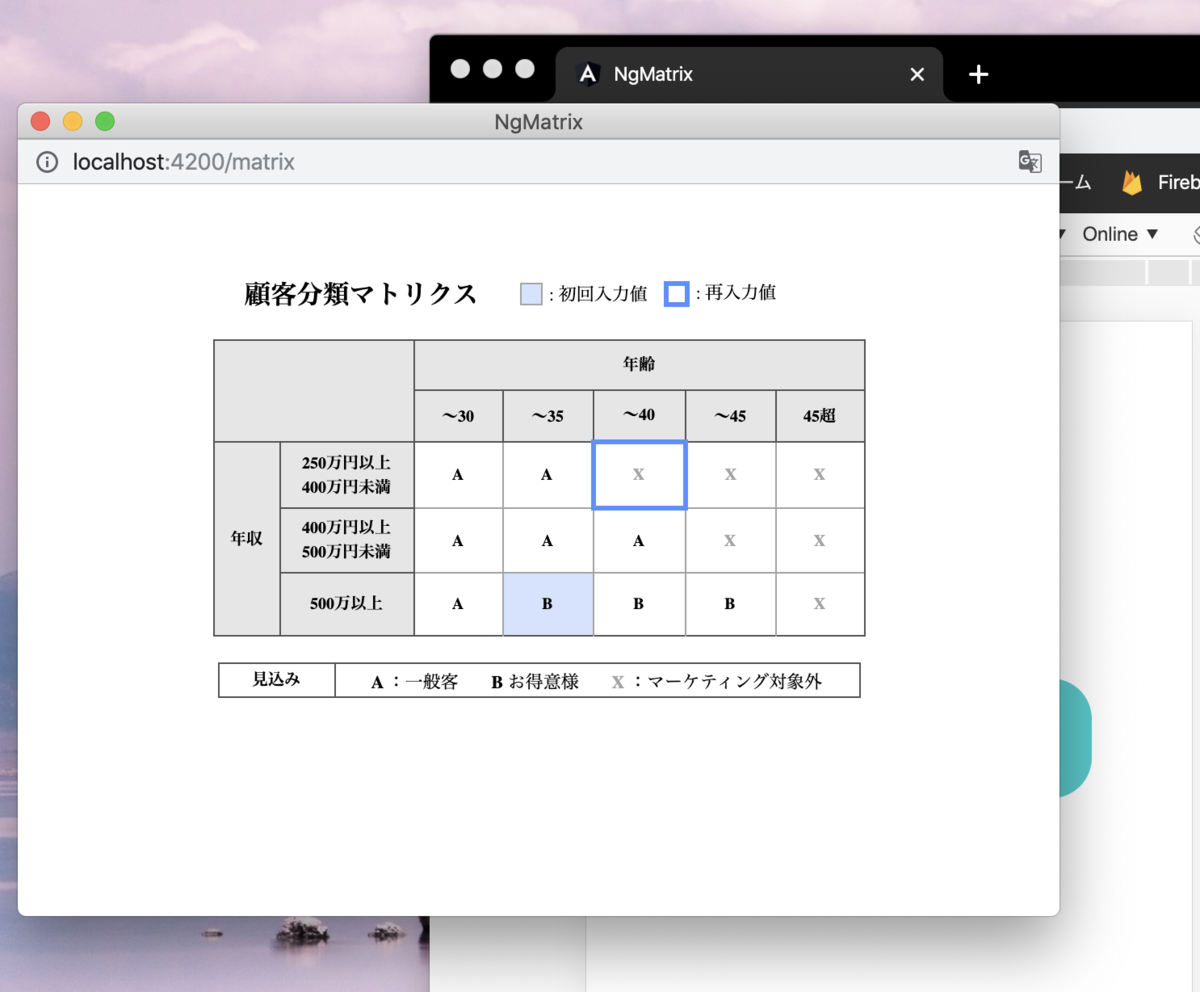
// 子ウィンドウに渡したいデータを作成
const message = new Message();
message.id = 5;
message.description = 'データ受信成功';

// ローカルストレージにデータを格納します
localStorage.setItem('key', JSON.stringify(message));

// 子ウィンドウを開く
const rootPath = window.location.origin + window.location.pathname;
window.open(rootPath + 'matrix', '_blank', 'location=no,scrollbars=yes');
localStorageにはstring型のデータしか格納できないため、JSON.stringify(message)とすることによってオブジェクトからJSON型文字列に変換してからlocalStorageに格納しています。
子ウィンドウの実装
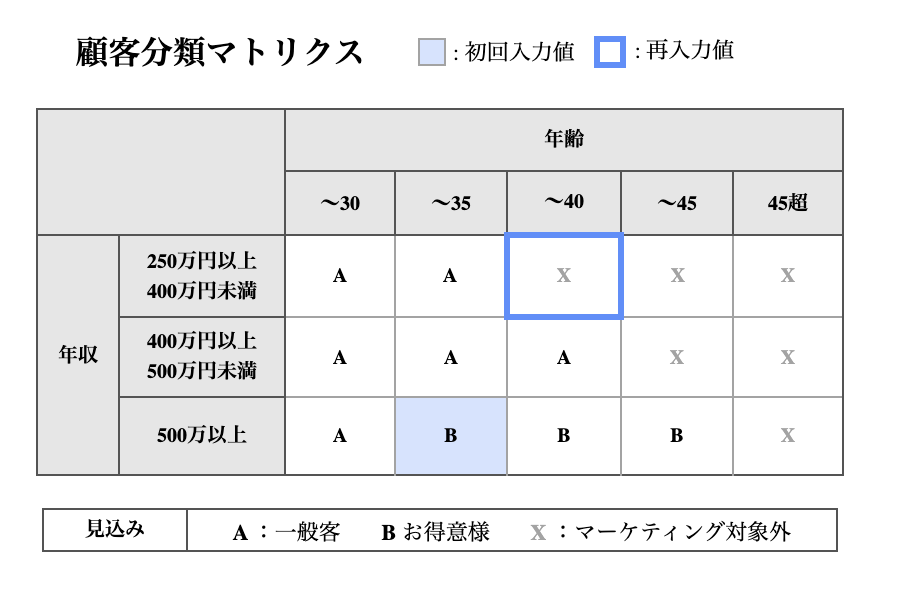
子ウィンドウでは、親ウィンドウで格納したデータをlocalStorage.getItem()で取り出すことによってデータを受け取っています。
// ローカルストレージ経由でデータを受け取る
const message: Message = JSON.parse(localStorage.getItem('key'));
this.id = message.id;
this.description = message.description;
JSON.parse()を使用することで、JSON型文字列からオブジェクトに変換しています。
window.postMessage()を採用した場合
続いて、window.postMessage()を使用してウィンドウ間でデータを渡す場合の実装について解説していきます。
親ウィンドウの実装
親ウィンドウでは、子ウィンドウを開いた後に、window.postMessage()でデータを送信しています。
// 子ウィンドウに渡したいデータを作成
const message = new Message();
message.id = 5;
message.description = 'データ受信成功';

// 子ウィンドウを開く
const rootPath = window.location.origin + window.location.pathname;
const popup = window.open(
  rootPath + 'matrix',
  '_blank',
  'location=no,scrollbars=yes'
);

// 子ウィンドウにメッセージを送信
popup.onload = () => popup.postMessage(message, window.location.origin);
ポイントとしては、window.onloadイベントハンドラ内でwindow.postMessage()を呼び出すことによって、子ウィンドウが開く前にpostMessageが送信されることを防いている部分です。
注意点:IEブラウザを使う場合
window.postMessage()でデータを送信している処理popup.onload = () => popup.postMessage(message, window.location.origin);ですが、IEブラウザでは正常に動作しません。下記のコードに書き換える必要があります。
popup[popup.addEventListener ? 'addEventListener' : 'attachEvent'](
  // ビルドエラー防止のため、例外的に文字列によるプロパティアクセスを使用している
  // tslint:disable-next-line:no-string-literal
  (popup['attachEvent'] ? 'on' : '') + 'load',
  () => popup.postMessage(message, window.location.origin),
  false
);
子ウィンドウの実装
子ウィンドウでは、window.addEventListener('message', (event) => {を使用することで、受信したメッセージを受け取っています。
なお、if (event.origin === window.location.originの部分では、メッセージ送信元のオリジンを確認することで、不正なメッセージの受信を防いでいます。今回は同一オリジン間でのメッセージのやり取りなので、送信元オリジンがwindow.location.originと一致していれば、OKとしています。
Angular以外の場合
    window.addEventListener('message', (event) => {
      if (event.origin === window.location.origin && event.data.id) {
        const message: Message = event.data;
        this.id = message.id;
        this.description = message.description;
      }
    });
受信したメッセージは、event.dataの部分になります。
Angularの場合
Angularを使用している場合は、window.addEventListenerを@HostListenerに書き換えることができます。
  @HostListener('window:message', ['$event'])
  public onPostMessage(event) {
    if (event.origin === window.location.origin && event.data.id) {
      const message: Message = event.data;
      this.id = message.id;
      this.description = message.description;
    }
  }
参考サイト
javascript - Problems with window.postMessage on Chrome - Stack Overflow
https://qrunch.net/@tercel/entries/hazZdGPlAaoAHGWD
javascript - Detecting the onload event of a window opened with window.open - Stack Overflow